With Sinric Pro, you can easily connect the Google Home and Amazon Alexa App with ESP8266, NodeMCU or ESP32 microcontroller to control any appliance with Google Assistant and Alexa.
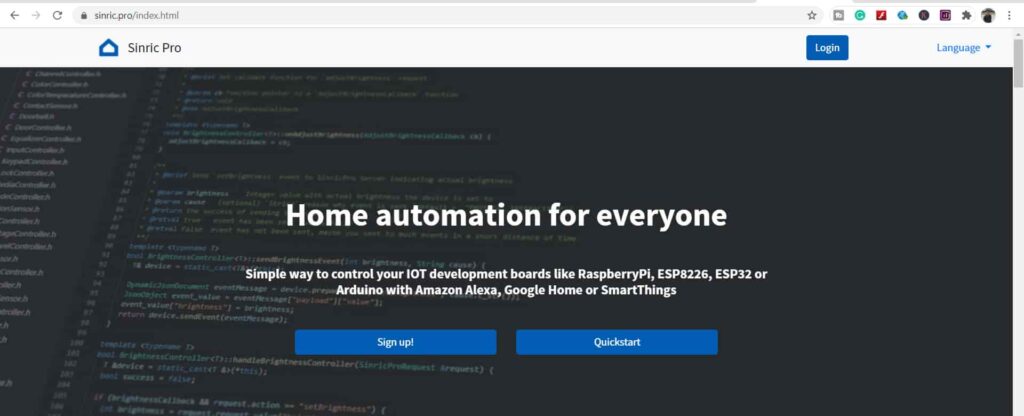
So, you can easily make any IoT-based home automation project with Sinric Pro. As per their current plan (20th, April 2021) you will get 3 devices for free.
Related Post:
Table of Contents
Create the Sinric Pro Account
First visit sinric.pro/register
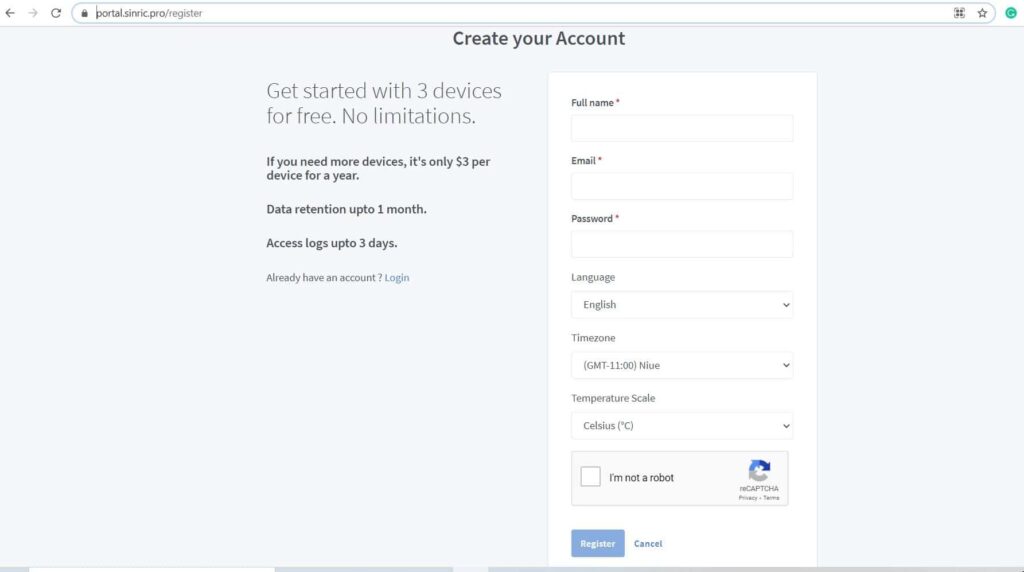
Then enter all the required details and click on Register.
Sinric Pro Login
After the creating the account, please visit sinric.pro/login
Then enter the email id and password, and click on login.
Create a Room in Sinric Pro
Before adding the devices, first you have to create room in the Sinric Pro.

Steps for creating rooms in Sinric Pro:
- Goto Rooms in the left side menu.
- Click on Add Room button.
- Enter the Room Name and Description.
- Click on Save.
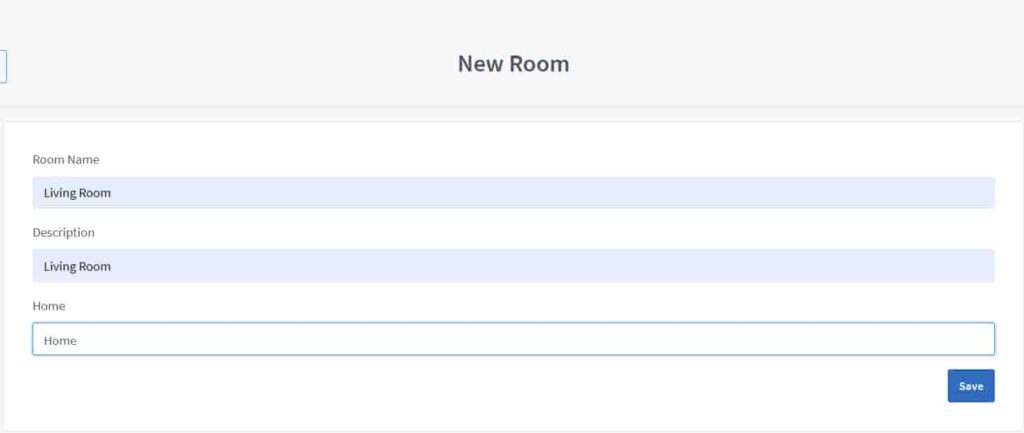
In this way, you can create multiple rooms as per the requirement.
Add Devices in Sinric Pro
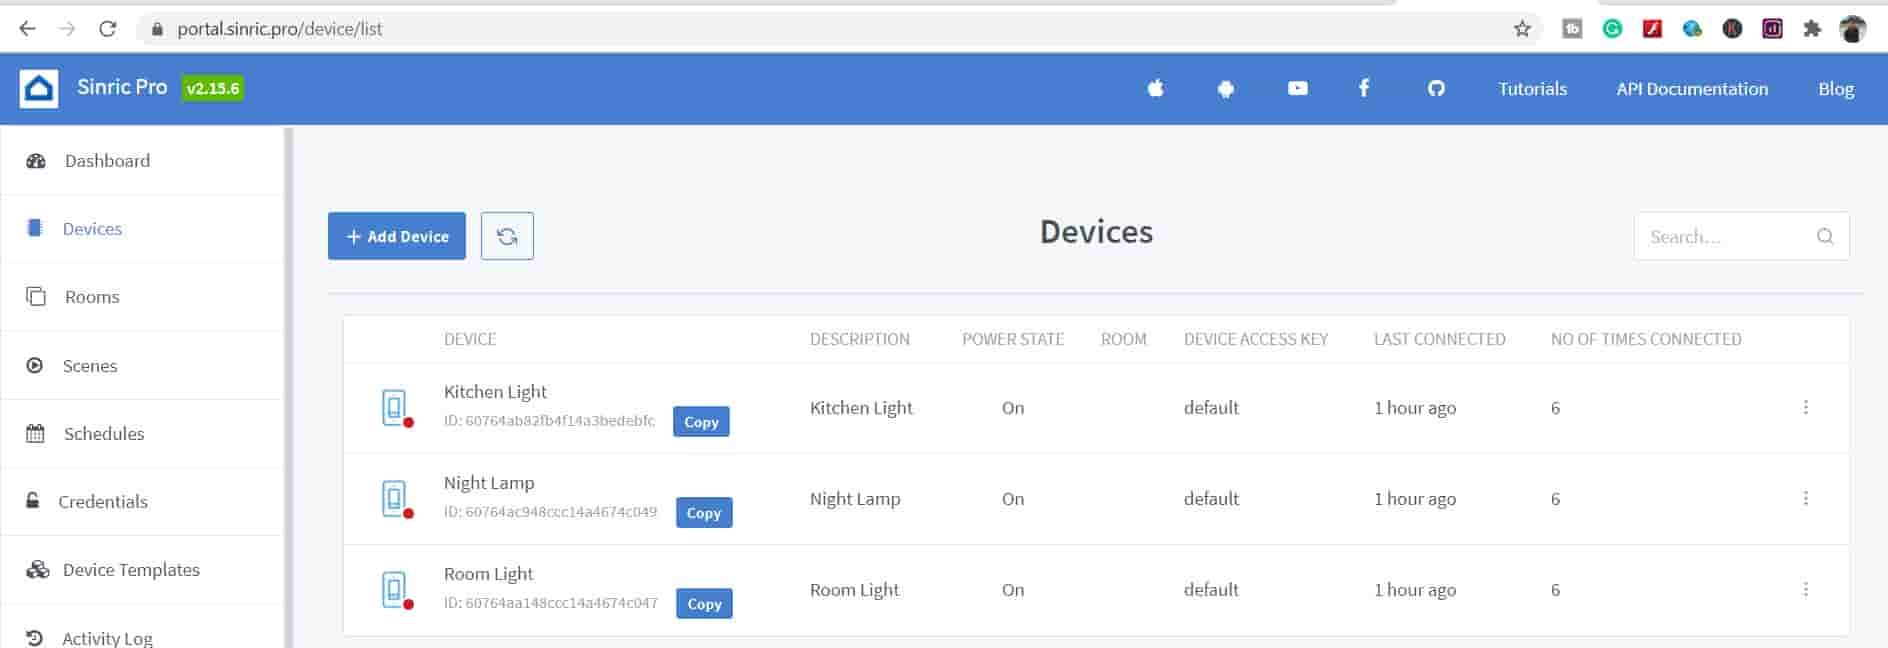
Please follow the following steps to add devices to the Sinric Pro account.
Go to Devices from the left side menu.

First select the Devices from left side menu, then click on Add Device button.
Enter the Device details:
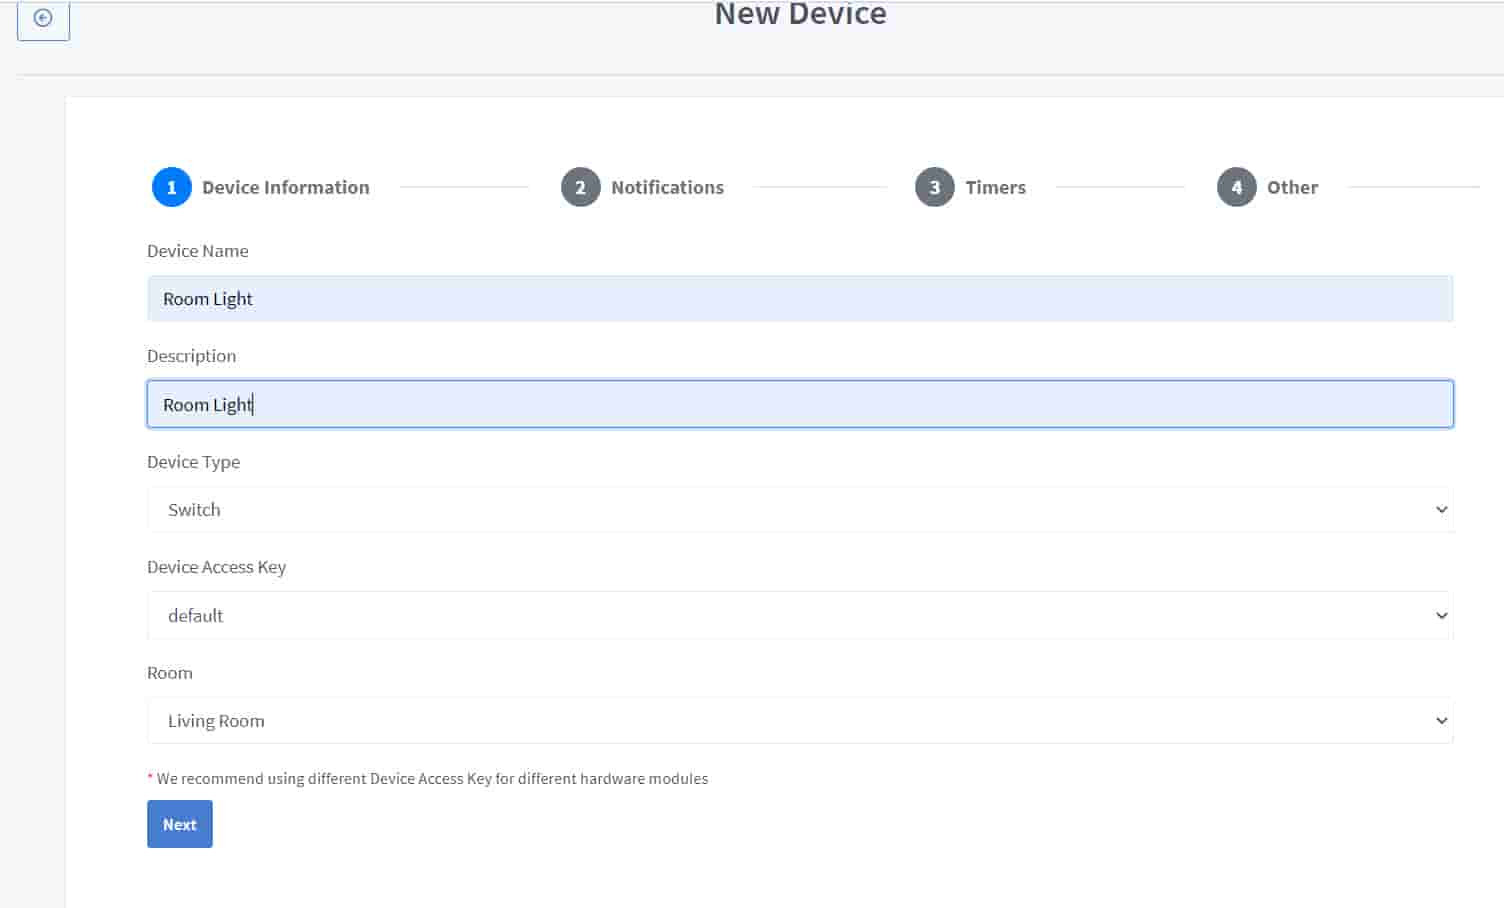
Enter the Device Name and Description.
Then select the Device Type as per the requirement. Here I have selected device type as Switch, as I will control the SPDT relay.
Then select the Room for the device.
After that click on Next.
Setup Push Notification to the Mobile
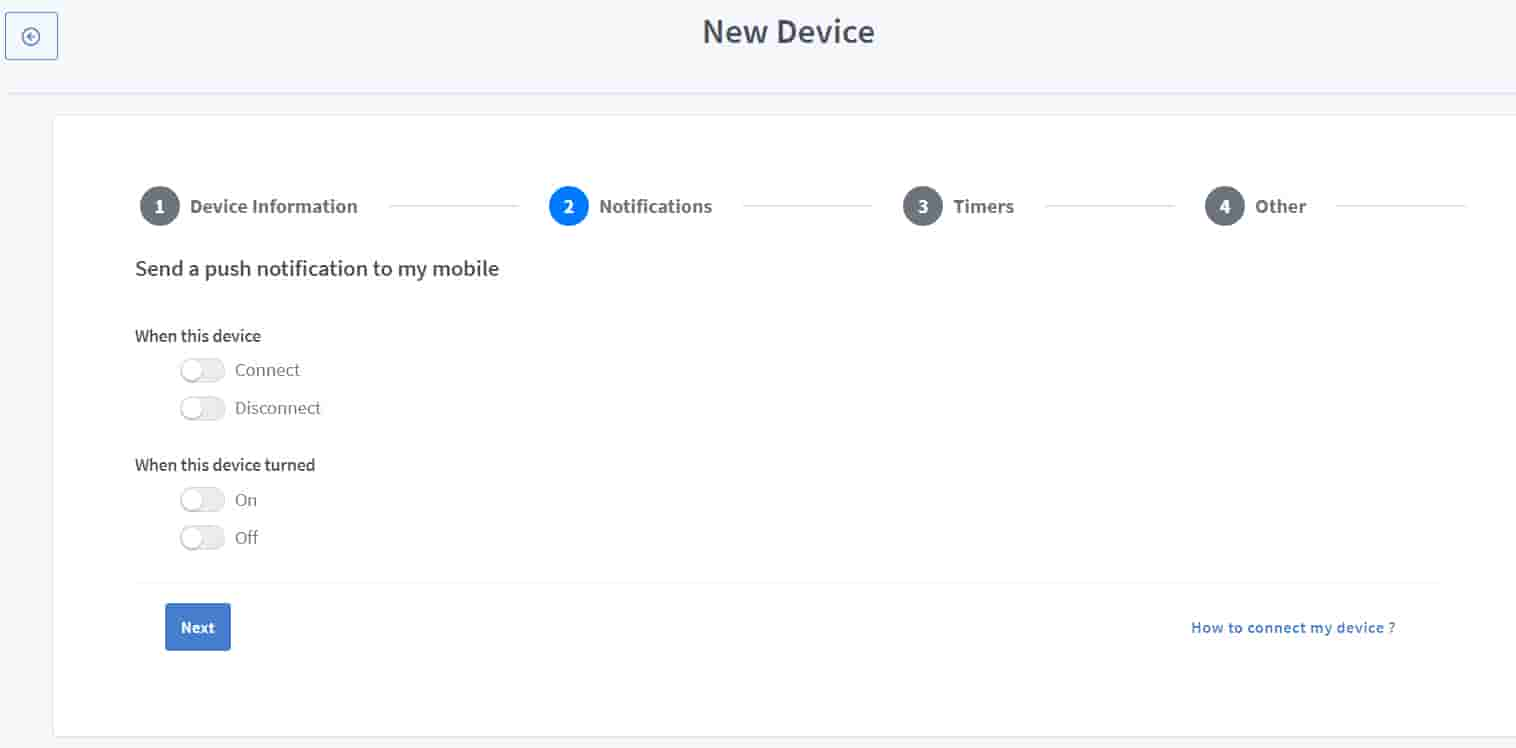
If you want any push notifications related to this device, then you can turn on the notifications.
This field is optional.
Click on Next.
Set up Timers
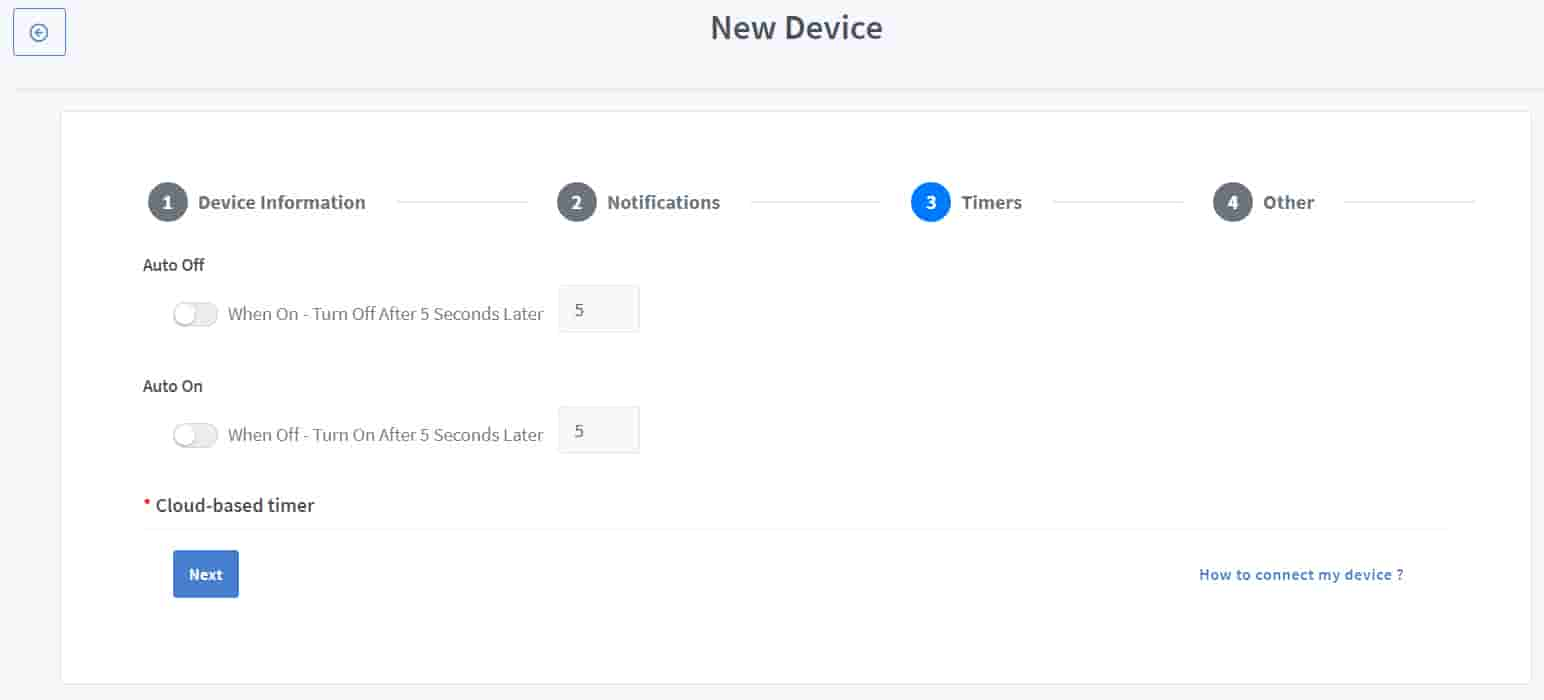
If you want to set any timer to Auto On or Auto Off the device, after the predefined time, then you the setup here. Again this field is optional.
Click on Next.
Set Up Energy Usage (Estimation)
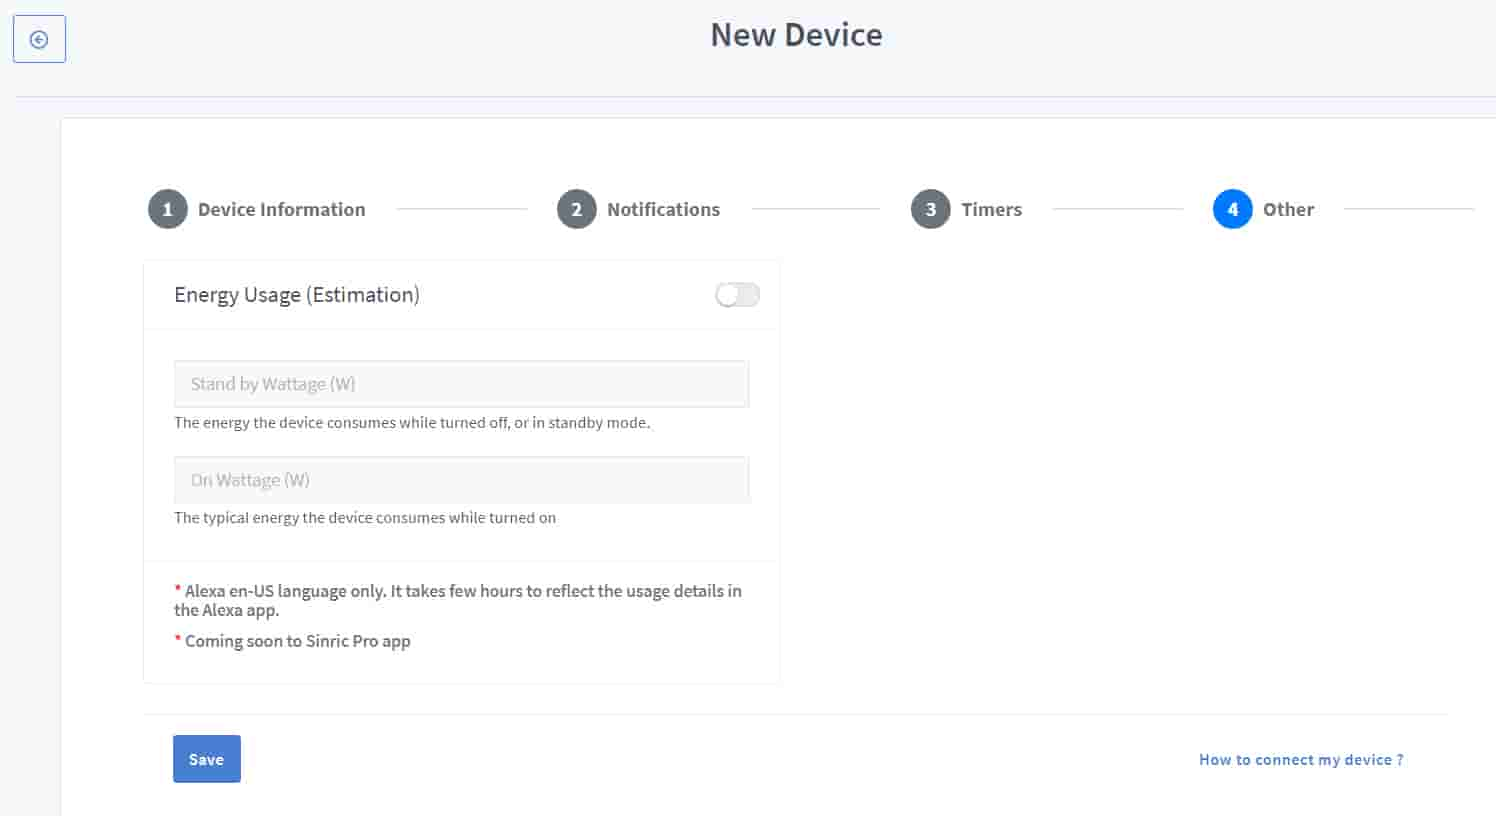
This is another optional field. You can define the wattage rating of the connected appliance to get the energy consumption estimation.
Now Click on Save. the device will be created.
If you use Sinric Pro free account, then you can add 3 devices for free.
Sinric Pro example for ESP8266 & ESP32
For any Sinric Pro project, first you have install the following libraries.
- Sinric Pro by Boris Jaeger (Download Sinric Pro examples for ESP8266 & ESP32)
- WebSockets by Markus Sattler (minimum Version 2.3.5)
- ArduinoJson by Benoit Blanchon (minimum Version 6.12.0)
Click Here to visit the GitHub page of Sinric Pro for more details.
Sinric API KEY & API SECRET
Before uploading any example sketch to ESP8266 or ESP32, you have to enter the Sinric API KEY and API SECRET

To get the API KEY and API SECRET, you have to go to Credentials from left side menu.
#define WIFI_SSID         "YOUR-WIFI-NAME"
#define WIFI_PASS         "YOUR-WIFI-PASSWORD"
#define APP_KEY           "YOUR-APP-KEY"
#define APP_SECRET        "YOUR-APP-SECRET"
After that, enter the APP KEY and APP SECRET with Wi-Fi name and Wi-Fi password in the code.
Also enter the device id in the code. You will find the Device ID from Devices menu.
**When you create a device in Sinric Pro, a unique ID assigned to that device. If you create 3 devices, then there will be 3 unique device IDs.


