In this article, I have explained how to connect ESP RainMaker with the Google Home app to control the appliances with Google Assistant.
First, download and install the Google Home App from Google Play Store.
Create a new Home in Google Home App
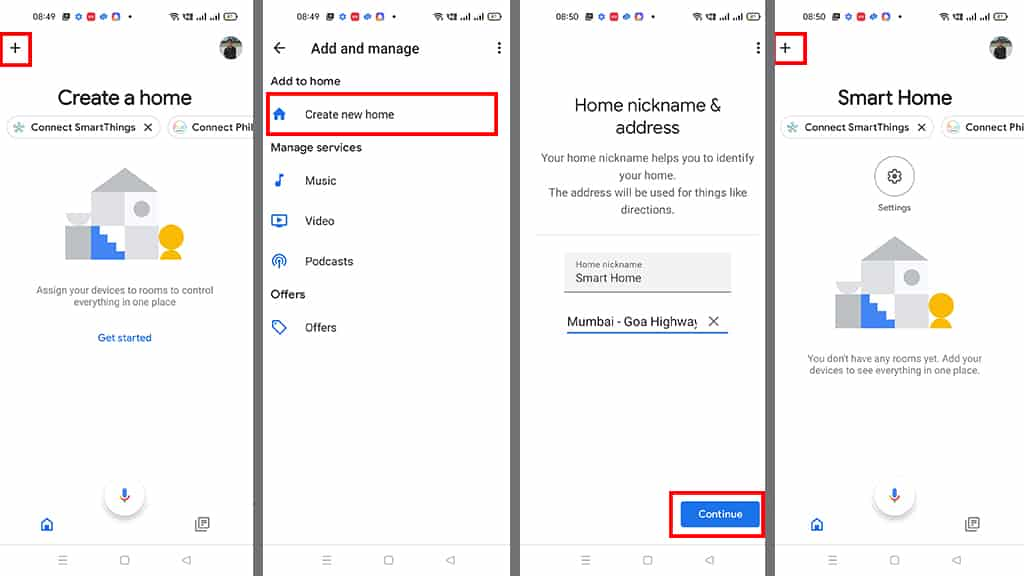
In the Google Home App, follow the following steps to create a Home:
- Click on the “+” icon (upper left corner).
- Tap on Create new home.
- Enter the Home nickname and address. Then tap on Continue.
- The Home is created.
After creating the Home in the Google Home app, you can connect the ESP RainMaker with the Google Home app.
But before connecting to Google Home, you must add devices in ESP RainMaker.
Related Post: How to add devices in ESP RainMaker
Connect ESP RainMaker with Google Home App
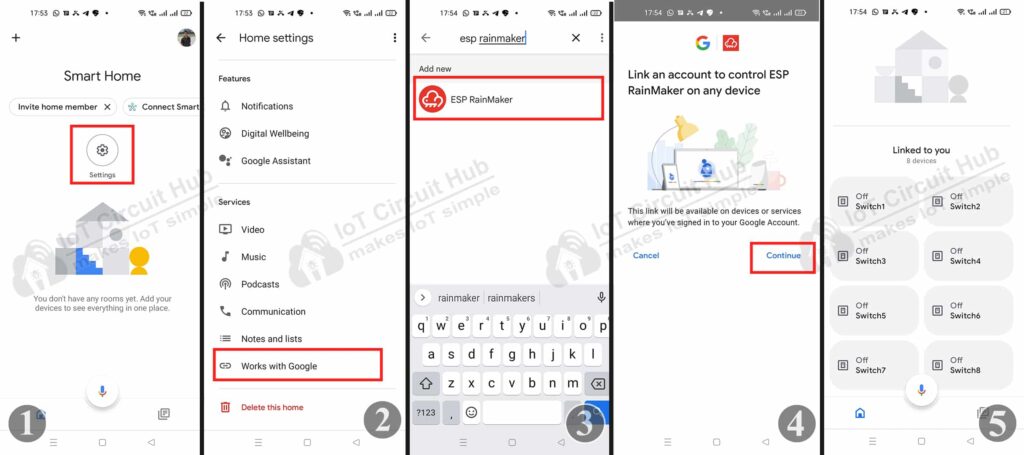
Steps to add ESP RainMaker with Google Home:
- Go to the Setting.
- Tap on Works with Google
- Search for ESP RainMaker, then tap on ESP RainMaker.
- Sign in to the ESP RainMaker account, Then tap on “Continue”.
- Go back to the home screen of the Google Home App. You can see all the devices added to the Google Home app.
Now, if the ESP32 is connected to the Wi-Fi, you can control the appliances from the Google Home app.
You can also ask Google Assistant, “Hey Google, Turn ON Switch” to control the appliances.
Related Post: ESP RainMaker Alexa App

