In this article, I have explained how to make an IoT-based Motion Sensor Camera using ESP32 CAM & PIR with Telegram App.

For this IoT-based ESP32 CAM project, You don’t have to connect with the same WiFi network. If the ESP32-CAM is connected to WiFi, you can get the photos from anywhere in the world on Telegram App.
Table of Contents
ESP32 CAM Project Overview

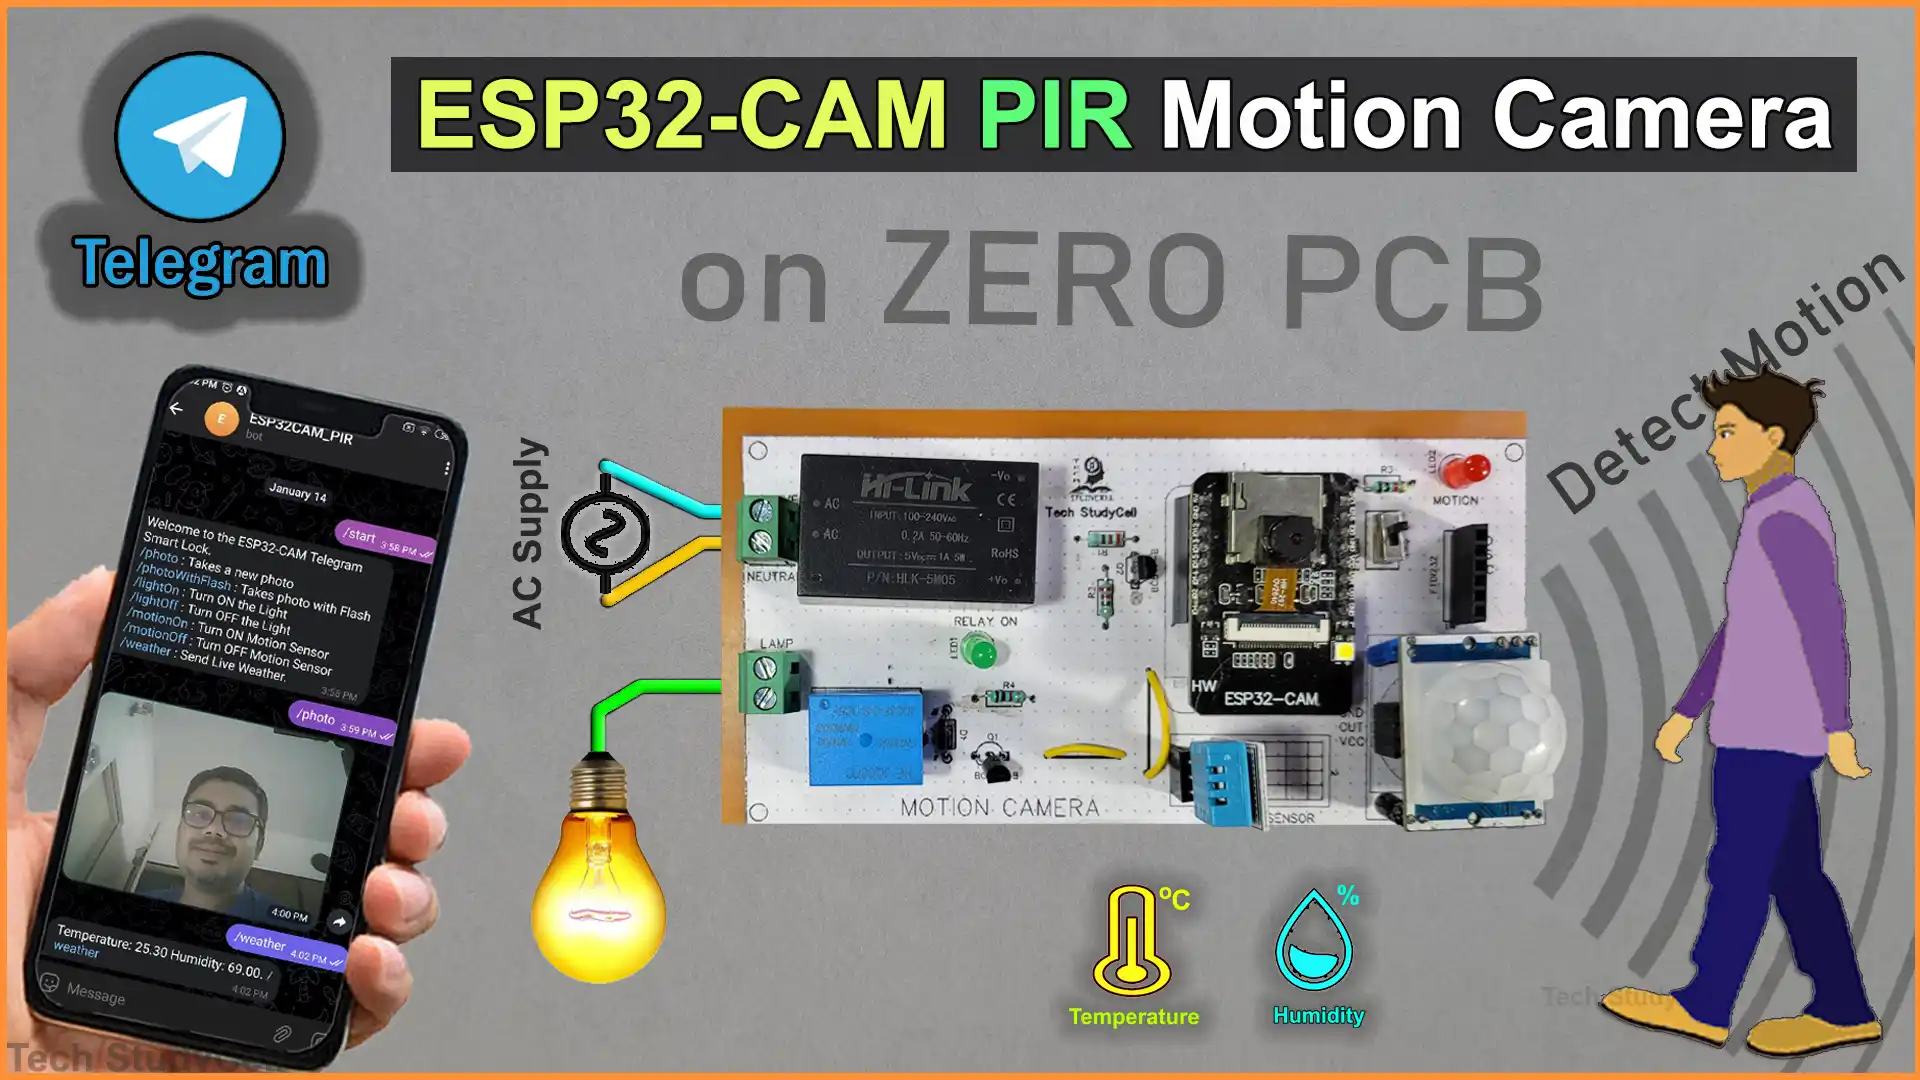
Here’s an overview of this IoT-based ESP32 CAM project:
- We will create a Telegram bot for the conversation with the ESP32-CAM;
- When we send the message /photo to the ESP32-CAM bot, the ESP32-CAM board receives the message, takes a new photo, and sends it to the Telegram bot;
- You can send the message /photoWithFlash to turn on ESP32-CAM’s LED flash and Lamp while capturing the photo;
- You can activate/deactivate the PIR sensor by sending the message /motionOn or /motionOff, if the motion sensor is active, it will keep on sending photos, whenever it senses any motion;
- You can control an AC lamp by sending the message /lightOn or /lightOff;
- You can monitor the LIVE room temperature on the Telegram app by sending the message /weather;
- You can send the /start message to receive a welcome message with all the commands to control the ESP32CAM;
- The ESP32-CAM will only respond to messages coming from your Telegram account ID.
Required Components for ESP32CAM Project

- ESP32 CAM
- PIR sensor
- DHT11 Sensor
- 220-ohm 0.25watt Resistors – 2 no
- 1k 0.25watt Resistors – 2 no
- 1N4007 Diode
- BC547 NPN Transistor – 2 no
- LED 5mm – 2no
- 5V SPDT Relay
- 2-pin Terminal connectors (2 no)
- SPDT slide switch
- AC to DC converter 5M05 5V
- FTDI232 TTL converter.
Circuit of the ESP32 CAM PIR Sensor Project

In the circuit, I have used an AC to DC converter to supply 5V to the circuit.
The PIR sensor connected with the GPIO13 through a BC547 NPN transistor. And to control the relay we have used GPIO12.
The DHT11 sensor is connected with the GPIO2 of ESP32CAM.
By turning on the slider switch connected across GPIO0 and GND, we can go to program mode. Then we can program the ESP32CAM using an FTDI232 TTL converter as shown in the circuit.

You can set the delay and sensitivity of the PIR sensor as per your requirement.
PCB Layout for ESP32CAM Motion Sensor Camera


Please download the PCB layout, then print it on the A4 page.
Please check the PCB size while printing, it should be the same as mentioned in Layout.

As shown in the video, with the help of the PCB Layout you can easily make the complete circuit on zero PCB.
Tutorial video on ESP32 CAM PIR Sensor Telegram
During the ESP32-CAM tutorial video, I covered the following topics:
- Quick demo on IoT-based motion camera using ESP32CAM.
- Explained the Circuit of the ESP32 CAM PIR motion camera.
- How to make the IoT-based motion camera on Zero PCB.
- Create Telegram BOT for the ESP32-CAM
- Programming ESP32 CAM motion detector camera.
- PIR motion sensor security camera connection.
How to Create a Telegram Bot for ESP32 CAM
Steps to create Telegram Bot for the conversation with the ESP32-CAM.
Generate Telegram Bot Token from BotFather

Go to Google Play or App Store, download, and install the Telegram app.
1. Search for “botfather” and click on the BotFather (t.me/botfather) and click on START.
2. Click or type /newbot and enter a unique name for the bot.
3. Enter a unique username for the BOT. (It must end in “bot”.)
4. You will get an HTTP API BoT token. Save the bot token as you’ll need it so that the ESP32CAM can interact with the bot.
Note: The bot token is a very long string. So copy the complete token or, you can go to the Telegram Web Interface to copy the bot token from there.
Get Your Telegram User ID

1. Search for “myidbot” ( t.me/myidbot ) in the Telegram app.
2. Click on Start or Restart.
3. Click or Type “/getid“.
4. You will get a reply back with your user ID. Save that user ID, as you’ll have to update it in the code.
Note: Click on the correct IDBot with the blue logo (as shown in the picture).
Program ESP32 CAM with Arduino IDE

To program the ESP32CAM, first, turn on the slider switch to connect GPIO0 with GND. Then connect the FTDI232 (5V) with ESP32CAM as per the circuit.
Preparing Arduino IDE
For this IoT-based project, I have used the Arduino IDE to program ESP32 CAM.
First update the Preferences –> Aditional boards Manager URLs: https://raw.githubusercontent.com/espressif/arduino-esp32/gh-pages/package_esp32_dev_index.json, http://arduino.esp8266.com/stable/package_esp8266com_index.json
- Then install the ESP32 board (2.0.5) from the Board manager or Click Here to download the ESP32 board.
- Download the required libraries from the following links:
- UniversalTelegramBot Library (1.3.0)
- ArduinoJson Library (6.20.0)
- DHT Library (1.4.4)
Source Code for ESP32CAM Motion Sensor Camera
Click on the following buttons to download the source codes for this DIY motion sensor camera project using ESP32CAM Telegram.
In the code, you have to update the following details.

- Enter the WiFi Credentials. ( WiFi Name & WiFi Password )
// Replace with your network credentials
const char* ssid = ""; //WiFi Name
const char* password = ""; //WiFi Password- Enter the Telegram User ID and Bot token.
// Initialize Telegram BOT
String chatId = "XXXXXXXXXX";
String BOTtoken = "XXXXXXXXXX:XXXXXXXXXXXXXXXXXXXXXXXXXXXXXXXXXXX";
After doing these changes, please upload the code to ESP32CAM.

Under the Tools menu, select Board: “AI Thinker ESP32-CAM“, Partition Scheme: “Huge APP (3MB No …), and proper PORT.
Now click on the upload button.
After programming the ESP32CAM, turn off the slider switch to exit from program mode and reset the ESP32CAM.
PCB for the ESP32CAM PIR Sensor

You can also download the PCB Gerber file and order the PCB from PCBWay.
About PCBWay and their services
You can order any custom design PCBs from PCBWay at very reasonable prices.

PCBWay not only produces FR-4 and Aluminum boards but also advanced PCBs like Rogers, HDI, and Flexible and Rigid-Flex boards, at very affordable prices.
For the online instant quote page please visit – pcbway.com/orderonline
You can also explore different PCB projects from their Open-source community pcbway.com/project/.
Connecting PIR, DHT11, Lamp & AC supply with PCB

Now connect the PIR sensor, DHT11, lamp, and AC supply as per the above diagram.
Please take proper safety precautions while connecting the AC voltage.
Testing the ESP32CAM Motion Sensor Camera
Now, go to your Telegram app, and open a conversation with your bot (Tap on the BOT name from the BotFather window). Send the following commands and see the bot responding:

- /start : Shows the welcome message with the valid commands;
- /photo : Capture a new photo and sends it to your Telegram account.
- /photoWithFlash : Capture a new photo with Flash.
- /lightOn : Turn on the AC Lamp connected with relay.
- /lightOff : Turn off the AC Lamp connected with relay.
- /motionOn: Activate the PIR Motion Sensor.
- /motionOff : Deactivate the PIR Motion Sensor.
- /weather : Sends Live Temperature & Humidity reading from the DHT11 sensor.

If you try to interact with the bot from another Telegram account, you will get the “Unauthorized user” message.
I hope you like this IoT-based PIR Motion Sensor Camera using ESP32CAM and Telegram.
Click Here for more such ESP32 projects.
Please do share your feedback on this IoT project. Thank you for your time.

