In this ESP RainMaker tutorial, I have explained, how to add devices to the ESP RainMaker app.
First, you have to download and install the ESP RainMaker app from Google Play Store or App Store.

After programming the ESP32, you have to follow these steps to add devices.
Generate the QR code
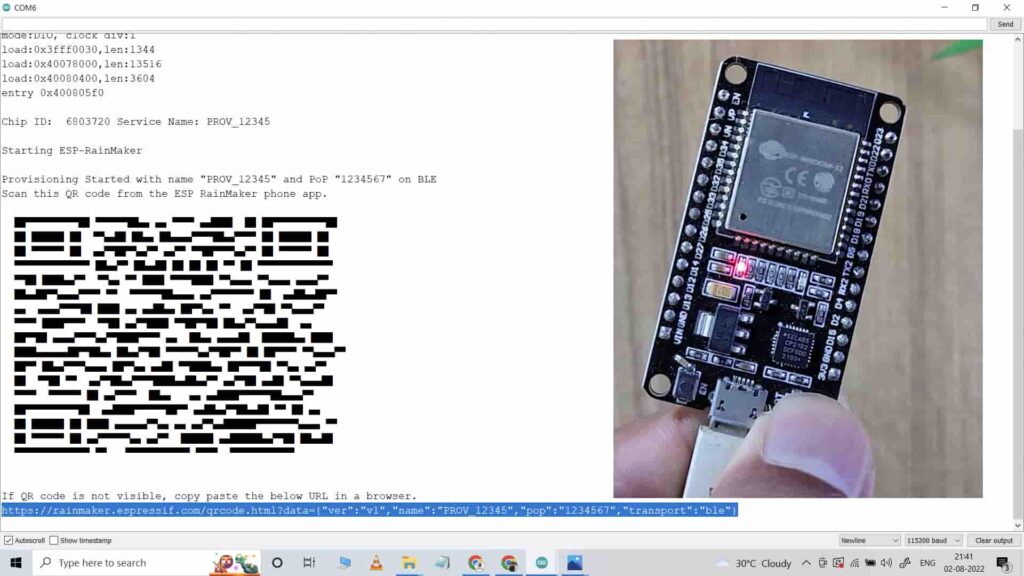
Open the serial monitor, and select Baud Rate: 115200.

Then press and hold the BOOT button of ESP32 for at least 4 seconds.
After releasing the BOOT button, a QR code will appear on the Serial Monitor.
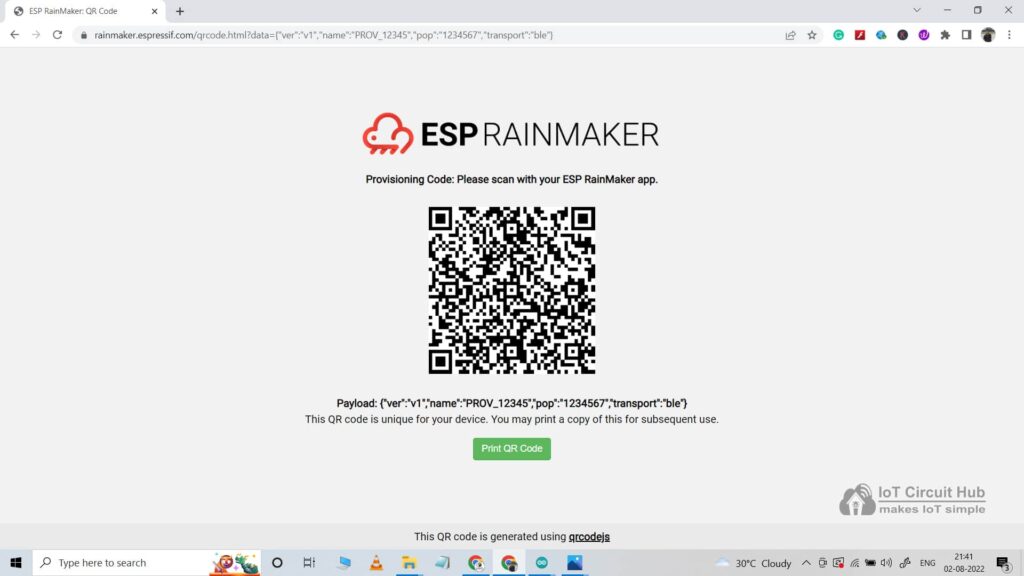
Now, copy the URL, just below the QR code, and open the URL in a browser.

This QR code is unique, so you can print the QR code. Later on, if you want to change the WiFi details, you can use the same QR code.
Scan QR code to Add Devices in RainMaker Dashboard
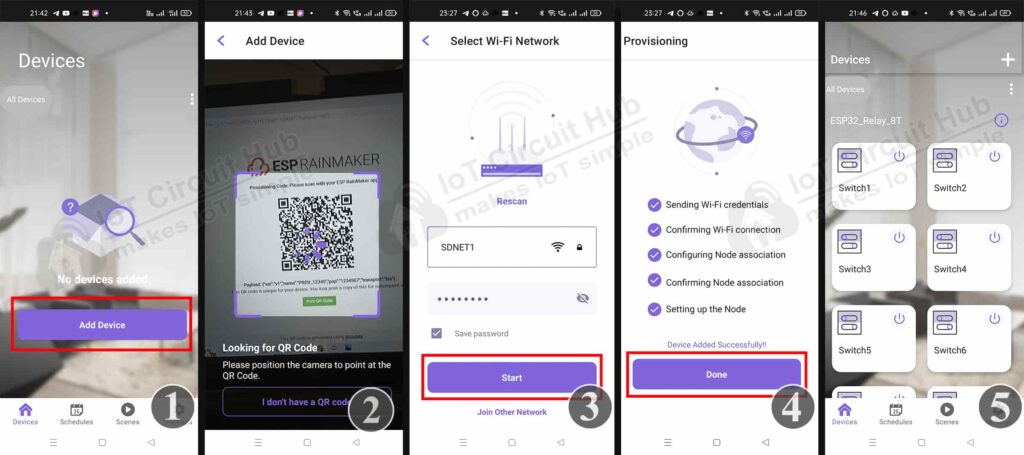
Now open the ESP RainMaker App and turn on Mobile Bluetooth and GPS (Location).

- Tap on “Add Device“.
- Scan the QR code from the Browser and Pair the Bluetooth.
- Enter the WiFi credentials (WiFi Name & Password). Tap on “Start“.
- After the process is complete, tap on “Done“.
- Now, all the devices are added to the ESP RainMaker dashboard.
Thus you can easily add devices to the ESP RainMaker app.
Now, please refer to the following articles to connect the ESP RainMaker with Amazon Alexa and Google Home App.
**Important Points
You have to define the Node Name and Device Names in the code, the Rainmaker app will fetch the device names and device types from ESP32.
If you face any connectivity issues, then press the BOOT button again for 4 seconds, scan the QR code and follow all the steps mentioned above.
To change the WiFi details, press the BOOT button again for 4 seconds, scan the QR code and enter the new WiFi details.
For more details please click here.


