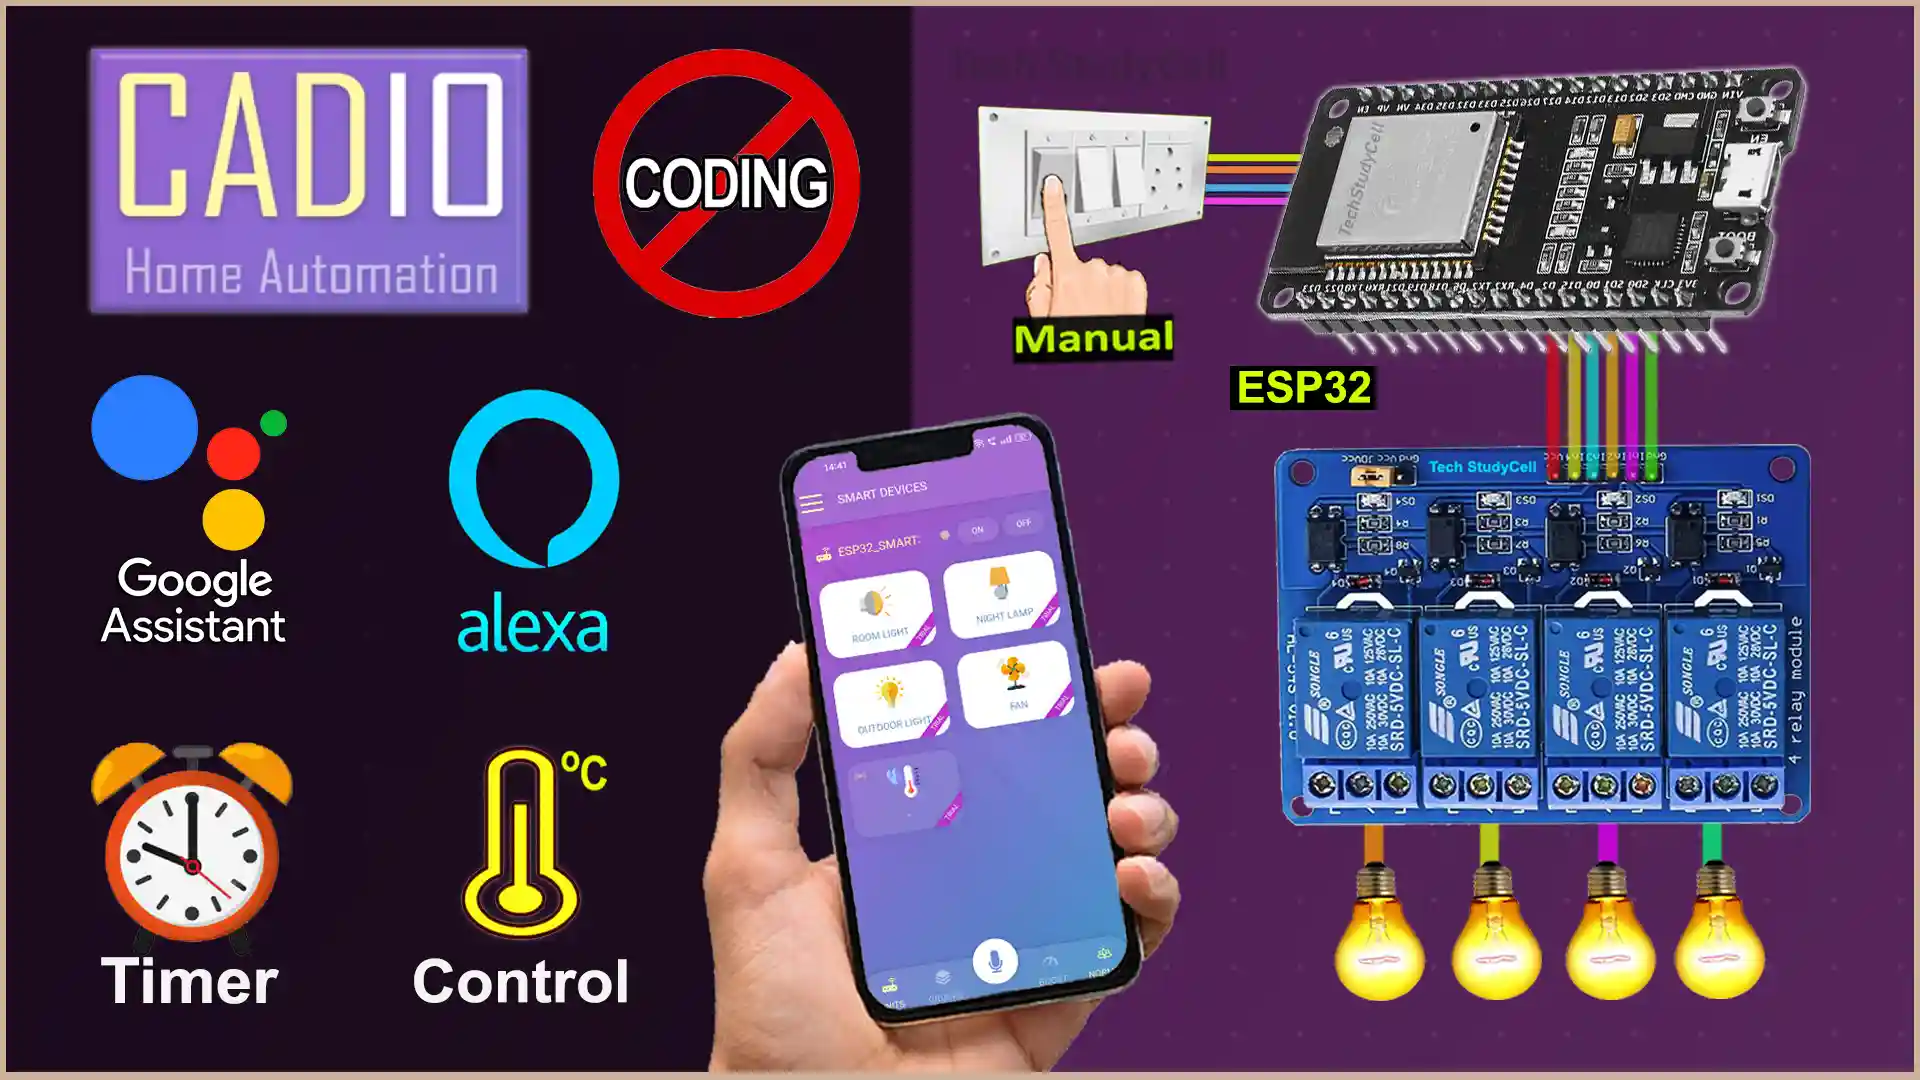
In this IoT project, I have explained how to make IoT based Cadio home automation using ESP32 Google Assistant to control relays with voice commands and manual switches. If there is no WiFi available, you can still control the appliances with manual switches.

You don’t need any coding skills to make this home automation project. I have used all the free tools for this IoT-based smart home system.
So if you follow all the steps, you can easily make this IoT-based Home Automation System with ESP32 and Sensors.
Table of Contents
Required Components:
- ESP32 Devkit V1.
- 4-channel 5V SPDT Relay Module.
- DHT11 temperature sensor
- Switches
Circuit of the ESP32 Home Automation System

The circuit is very simple, I have used D23, D22, D21 & D19 GPIO to control the 4-channel relay module.
And the GPIO D13, D12, D14 & D27 are connected with switches to control the relay module manually.
As per the source code, when the control pins of the relay module receive a LOW signal the relay will turn on and the relay will turn off for the HIGH signal in the control pin.
The DHT11 sensor is connected to RX2 (GPIO16) and the WiFI LED is connected with the D15.
I have used a 5V 5Amp mobile charger to supply the circuit.
Please take proper safety precautions while connecting the AC appliances.
Tutorial video on ESP32 Cadio Home Automation
During this Internet of Things tutorial video, I covered the following topics:
- Quick demo on the Cadio home automation using ESP32.
- Explained the circuit diagram of the ESP32 IoT project.
- How to download Cadio firmware for ESP32.
- Steps to configure the Cadio home automation app.
- Steps to connect Google Home with the Cadio.
Configure ESP32 with Cadio Firmware
Upload the Cadio Firmware to ESP32
First download the Cadio Firmware for ESP32 from the following link:
Download Link: egycad.com/cadio/downloads

Please refer to the following article to upload the Cadio Firmware to ESP32.
Steps to upload Cadio Firmware to ESP32
Now reset the ESP32 and press the BOOT button for 5 seconds to go to config mode. In config mode, the inbuilt blue LED will start blinking.
Configure ESP32 using the Cadio app
First, install the Cadio Home Automation app from Google Play Store or App Store, and create an account in Cadio.

- Open the Cadio app, tap on the 3-dash icon, and select Configuration.
- Turn Off mobile data and connect the “CADIO” hotspot created by the ESP32.
- Select Relay Mode: “ACTIVE LOW”.
- Now enter the GPIO pins for Indicator LEDs and Devices as per the circuit. Then tap on the tick icon (in the top right corner).
- Select the WiFi Name and enter the WiFi Password. Also, enter a unique unit name and tap on the tick icon.
- Wait for some time the dashboard will appear automatically.
Change Device Names & Sensor Type in the Cadio app

- You have to long press on the device.
- Now tap on “Settings” to open the setting page.
- Give a Device name and select the Device icon. Then tap on the tick icon to exit. In a similar way change the device name for all the devices.
- Long press on the DHT sensor icon and go to “Settings”.
- Select the Sensor type DHT11 and exit.
Now connect the ESP32 to the circuit.
PCB for this IoT Project using ESP32
You can also use the following PCB for this home automation project.
About PCBWay and their services
You can order any custom design PCBs from PCBWay at very reasonable prices.

You can also explore different PCB projects from their Open-source community pcbway.com/project/.
For more details please visit the following articles.
Why PCBway
PCB Capabilities
High-Quality PCB
Control Relays from Cadio Home Automation App

If the Wifi is available, the ESP32 will automatically connect and the wifi LED will turn on.
You can control the the appliance from Cadio app from anywhere in the world. You can also tap on the MIC icon and control the devices with voice commands.
Control the Relays manually with Switches

You can always control the appliances with manual switches. If the ESP32 is connected with WiFi, then you can monitor the real-time feedback in the Cadio Home Automation app.
If there is no internet, you can still control the relays with switches.
Control Appliances with Google Assistant
First, you have to connect the Cadio Home Automation app with Google Home.

After that, you can also control the appliances with Google Assistant.

Here I have used their Free Trial plan for this project. In the Free Plan, you can control the appliances for 500hrs. After that, again you have to upload Cadio firmware to ESP32 and configure it using the Cadio app. Then you can control the appliances for the next 500hrs.
I hope you like this IoT-based home automation system idea with ESP32 and Cadio app.
Click Here for more such ESP32 projects.
Please do share your feedback on this IoT project. Thank you for your time.


