
Want to build your own smart door lock without spending money on an expensive commercial system? In this ESP32 Smart Door Lock DIY project, we will build an offline access control system that allows you to unlock a door using virtual keys generated from a mobile-friendly web dashboard. The ESP32 creates its own Wi-Fi hotspot, so you can connect directly using your smartphone without needing a Wi-Fi router, internet connection, cloud server, or dedicated mobile app.
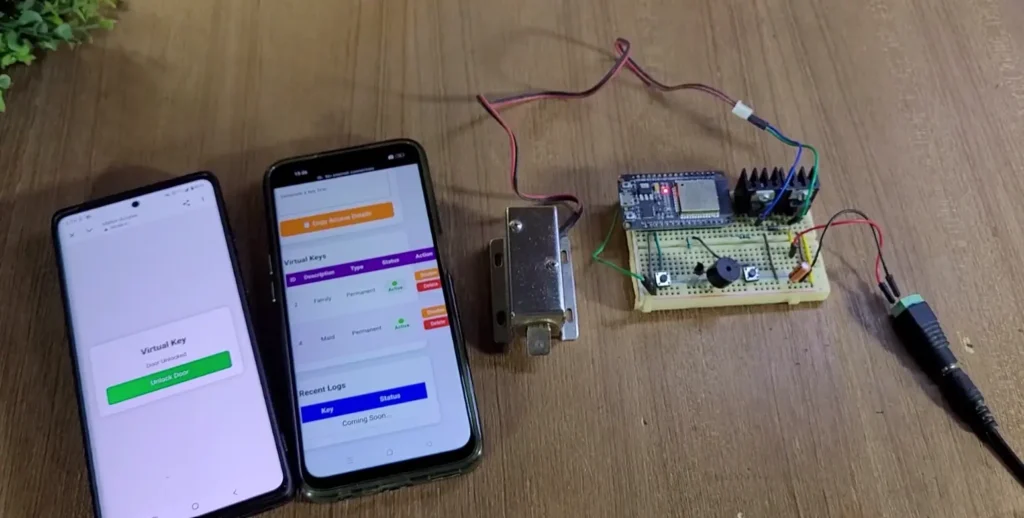
Inspired by modern smart access systems, this project combines an ESP32 development board, a 12V DC solenoid door lock, a web-based owner dashboard, and a virtual key management system. You can create one-time and permanent access keys, share access details with visitors, disable or delete keys, and automatically relock the door after a configured delay.
Whether you are an electronics enthusiast, student, maker, or IoT developer, this project is a great way to learn about ESP32 web servers, Wi-Fi Access Point mode, local authentication, embedded storage, and smart home automation.
Table of Contents
What Is an ESP32 Offline Smart Door Lock?
An ESP32 offline smart door lock is an electronic door access system controlled by an ESP32 microcontroller. Instead of relying on a cloud-connected smart lock, the system hosts its own local web interface and handles access requests directly on the device.
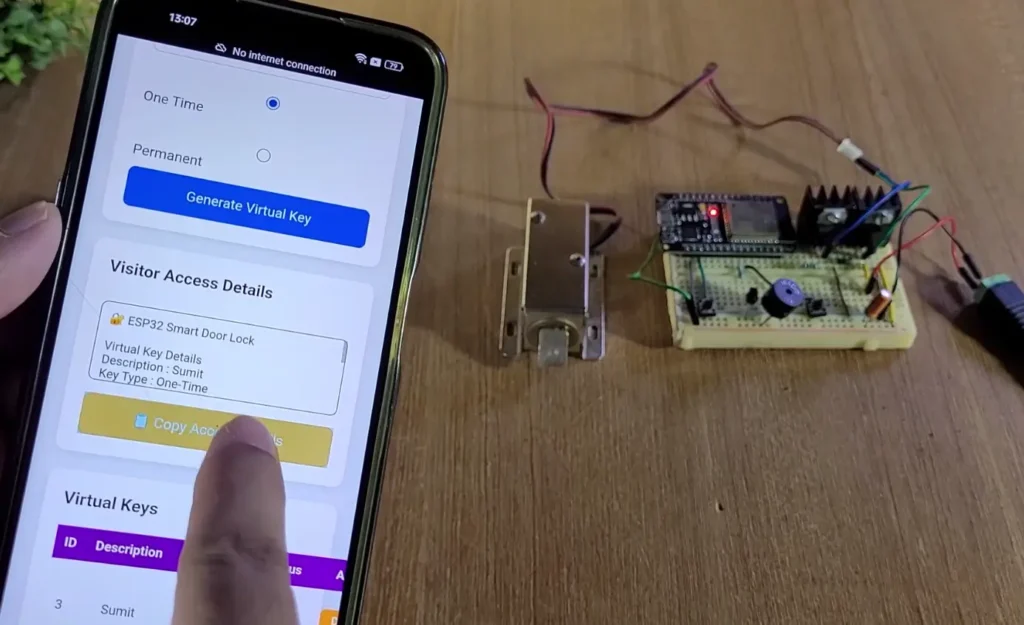
The ESP32 creates a Wi-Fi network that your smartphone can join. After connecting, you can open the dashboard in a web browser, create virtual access keys, and share the visitor access link.
The system uses a 12V DC solenoid lock controlled through a transistor driver circuit. When a valid access request is received, the ESP32 activates the lock driver and starts the automatic relocking timer.
The main advantage is that the entire access system works locally without an internet connection.
Watch the ESP32 Smart Door Lock Tutorial
Watch the complete tutorial video to see the circuit, hardware assembly, firmware structure, and virtual key workflow in action.
In the tutorial, you can follow the practical implementation and understand how the ESP32, solenoid lock, local web server, and storage modules work together.
Project Features
- Completely offline operation: No internet connection or Wi-Fi router is required.
- ESP32 Wi-Fi Access Point: The ESP32 creates its own hotspot for local access.
- Mobile-friendly web dashboard: Manage the door lock using a smartphone browser.
- Owner login: Access the dashboard through an owner authentication system.
- One-time virtual keys: Create a key intended to be used once.
- Permanent virtual keys: Provide continuing access until the key is disabled or deleted.
- Shareable visitor access: Share access details and the visitor link through messaging apps.
- Automatic door relocking: The lock returns to its locked state after the configured delay.
- Manual unlock button: Unlock the door using a physical button from inside.
- Doorbell button: Let visitors signal their arrival using a physical button.
- Buzzer and status LED: Provide audible and visual feedback.
- Local data storage: Store settings using Preferences and key records using LittleFS.
- Key management: Enable, disable, and delete supported virtual keys.
- No cloud subscription: No cloud platform or monthly service is needed.
Required Components
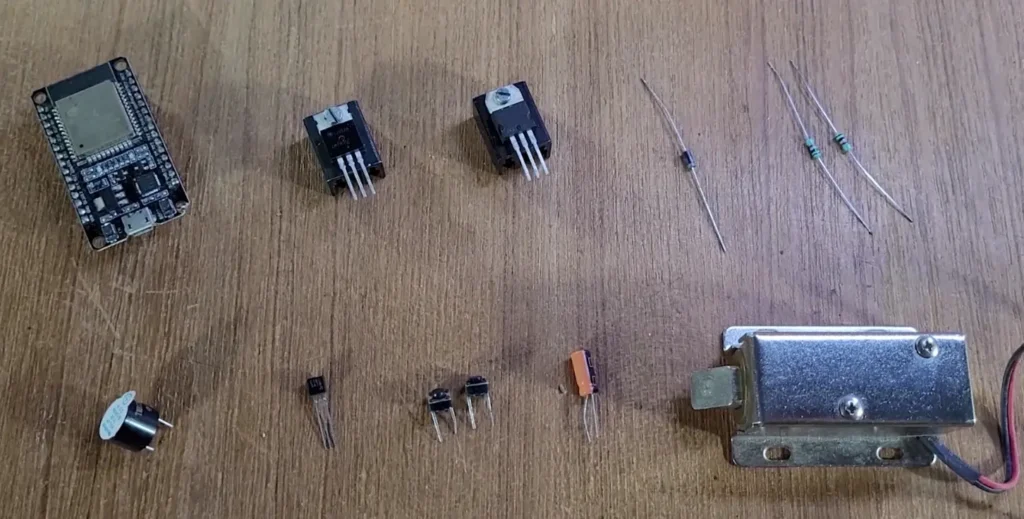
The following components are used to build the prototype.
| Component | Purpose |
|---|---|
| ESP32 development board | Main controller and Wi-Fi access point |
| 12V DC solenoid door lock | Electronic locking mechanism |
| TIP122 NPN transistor | Switches the solenoid lock current |
| BC547 NPN transistor | Buzzer driver, as used in the reference circuit |
| 1N4007 diode | Flyback protection for the inductive lock load |
| 7805 voltage regulator | Provides a regulated 5V supply in the reference circuit |
| 100µF, 25V capacitor | Power-supply filtering |
| 1kΩ resistors | Transistor base-current limiting, as shown in the circuit |
| DC buzzer | Audible notification |
| Status LED | Visual indication |
| Two push buttons | Doorbell and manual unlock |
| 12V DC power supply | Powers the lock and circuit |
| Breadboard or custom PCB | Circuit assembly |
| Connecting wires and connectors | Electrical connections |
Important: The solenoid lock draws substantially more current than an ESP32 GPIO can provide. Never power the lock directly from an ESP32 pin. Use a suitable transistor or MOSFET driver, correct flyback protection, and a power supply rated for the lock. Verify the regulator’s voltage, current capacity, heat dissipation, and the supply requirements of your particular ESP32 board before building the circuit.
Circuit Diagram and GPIO Connections
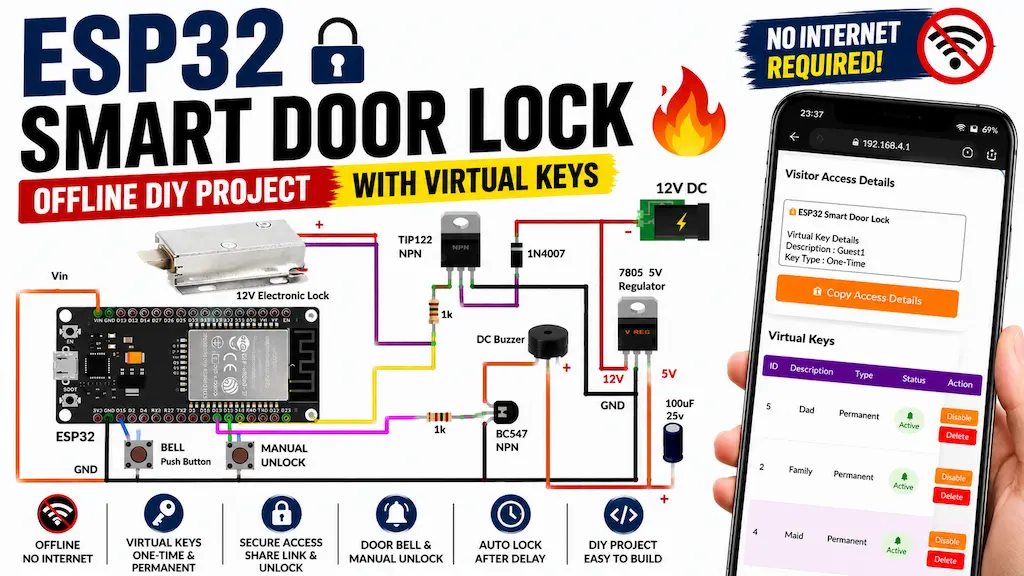
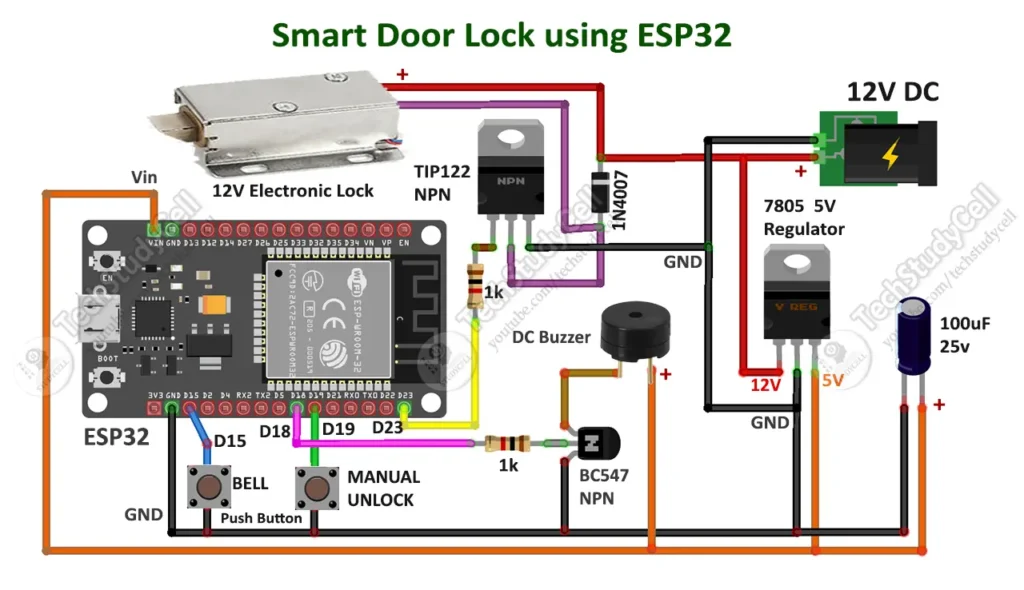
The ESP32 controls the solenoid lock, status LED, buzzer, and physical buttons. The following GPIO assignments correspond to the project firmware.
| Function | ESP32 GPIO | Configuration |
|---|---|---|
| Solenoid lock driver | GPIO 23 | Output |
| Status LED | GPIO 2 | Output |
| Buzzer | GPIO 18 | Output |
| Doorbell button | GPIO 15 | Input, active LOW |
| Manual unlock button | GPIO 19 | Input, active LOW |
The buttons use active-LOW logic: pressing a button connects its GPIO to GND. The firmware configures the button pins using the ESP32’s internal pull-up resistors.
The lock driver must be wired according to the transistor pinout and the solenoid’s current requirements. Check the actual component datasheets rather than relying only on the physical appearance of the parts.
How Does the ESP32 Smart Door Lock Work?
The system operates through the following stages.
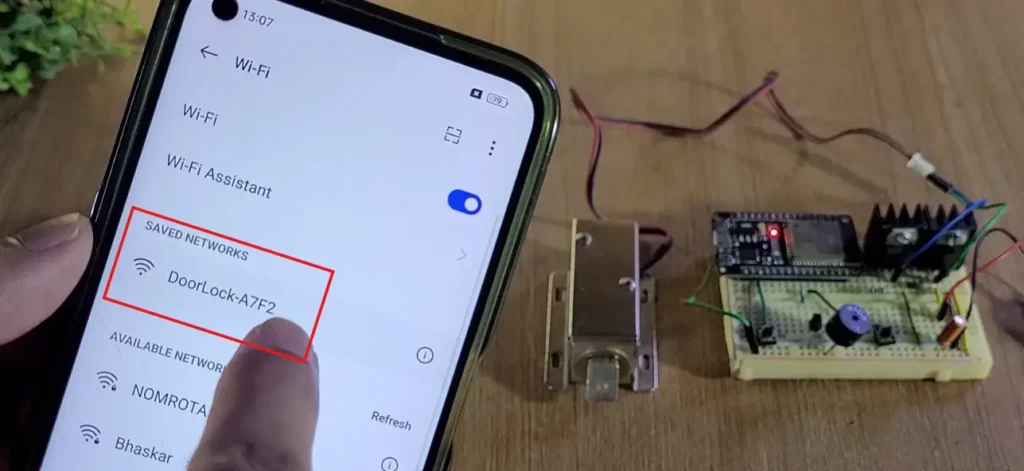
Step 1: The ESP32 Creates a Wi-Fi Hotspot
When the ESP32 starts, it initializes the hardware, loads the saved settings and local key database, and starts its own Wi-Fi Access Point.
You can connect your smartphone to this network without connecting the ESP32 to your home router. The dashboard is then accessed through the ESP32’s local IP address.
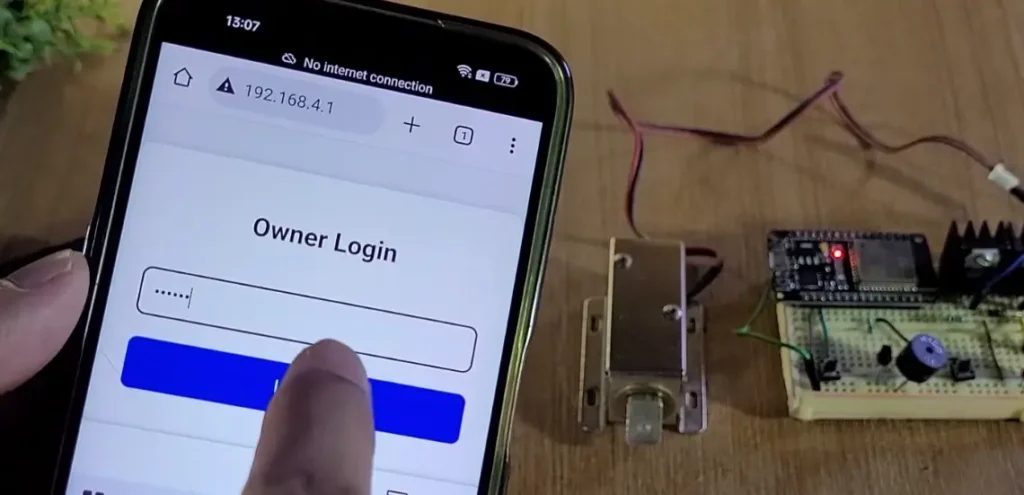
Step 2: The Owner Opens the Dashboard
Open a web browser on your smartphone and navigate to the dashboard address. After entering the owner credentials, you can access the available door-lock controls and virtual key management functions.
Step 3: Generate a Virtual Access Key
From the dashboard, create a virtual key and enter a description for the visitor. Select one of the available key types:
- One-Time Key: Intended for a single successful use.
- Permanent Key: Remains available until it is disabled or deleted.
The ESP32 stores the key information locally so that the system can manage access without a cloud database.
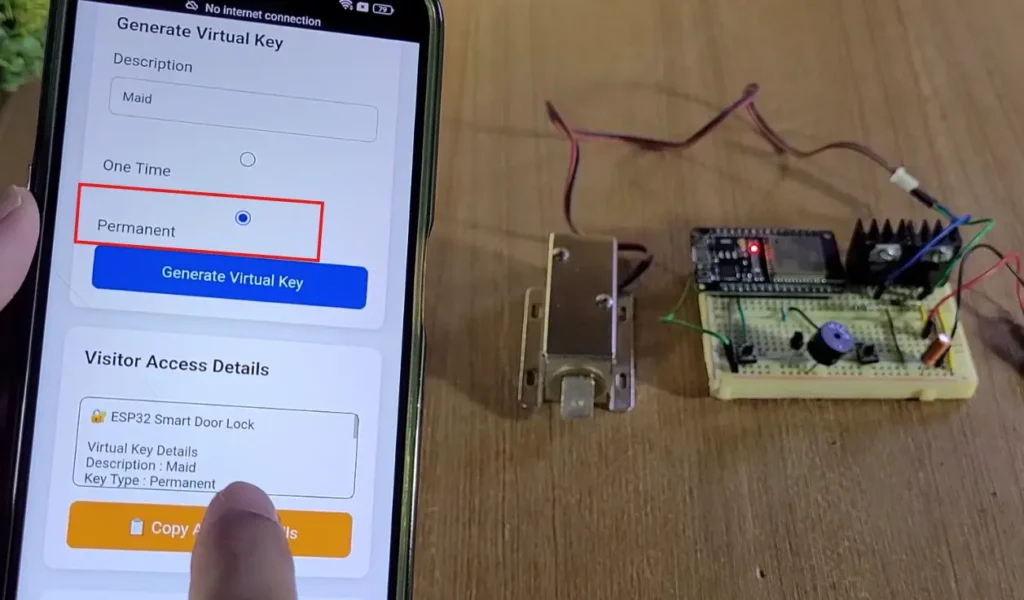
Step 4: Share the Visitor Access Link
The dashboard generates visitor access details that can be copied and shared through WhatsApp, SMS, or another messaging application.
The visitor must connect their smartphone to the ESP32’s Wi-Fi hotspot and open the shared access link. Sending the link alone does not provide internet connectivity or remote access to the ESP32.
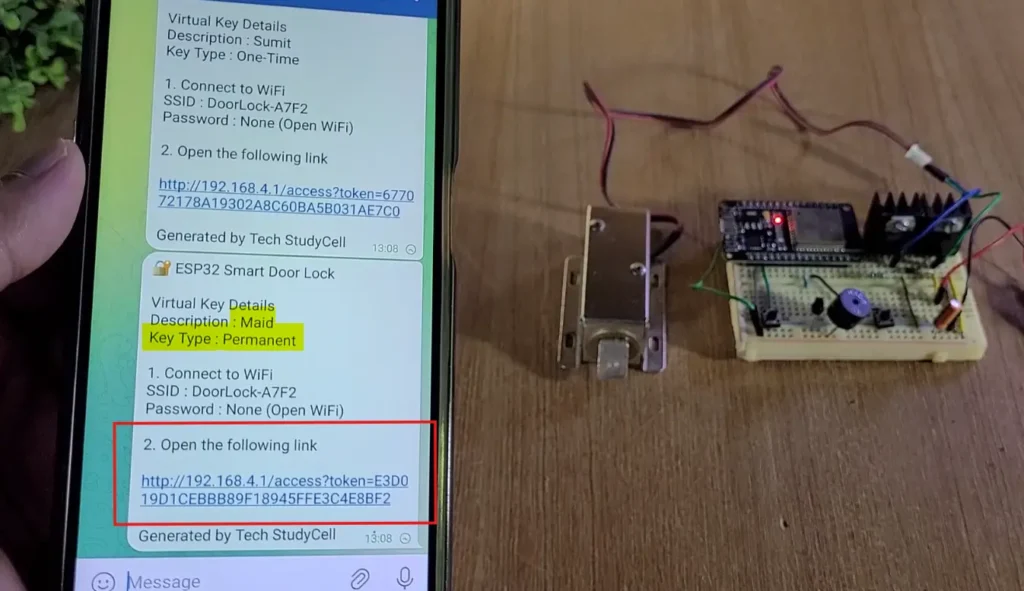
Step 5: Validate the Virtual Key
When the visitor requests access, the ESP32 checks the supplied token against the locally stored key records and their current status.
If the key is valid and active, the firmware authorizes the unlock operation. Invalid, disabled, or previously used one-time keys should not be accepted.
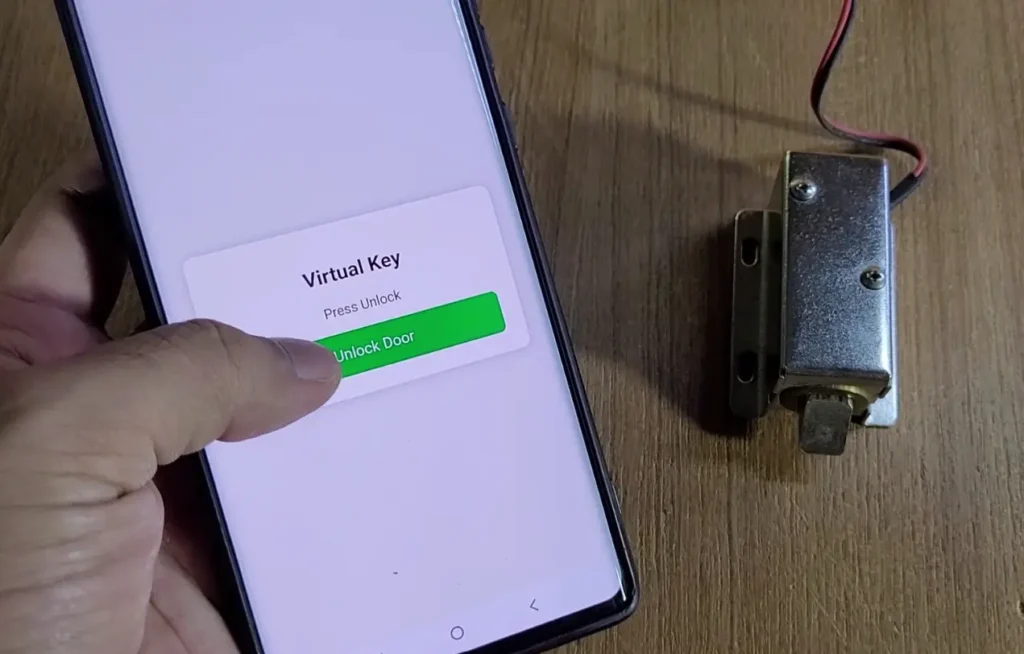
Step 6: Unlock the Solenoid Lock
The ESP32 activates the transistor driver connected to the 12V solenoid lock. The status LED and buzzer can provide feedback according to the firmware implementation.
The visitor can then operate the door according to the mechanical lock arrangement.
Step 7: Automatically Lock the Door Again
After the configured auto-lock interval, the ESP32 deactivates the lock driver and returns the lock to its locked state.
The auto-lock timer helps ensure that the door does not remain unlocked indefinitely after an authorized request.
Step 8: Manage Access Whenever Needed
The owner can return to the dashboard to review the available virtual keys, disable or enable supported keys, and delete keys that are no longer required.
A used one-time key cannot be reused once the firmware has marked it as used.
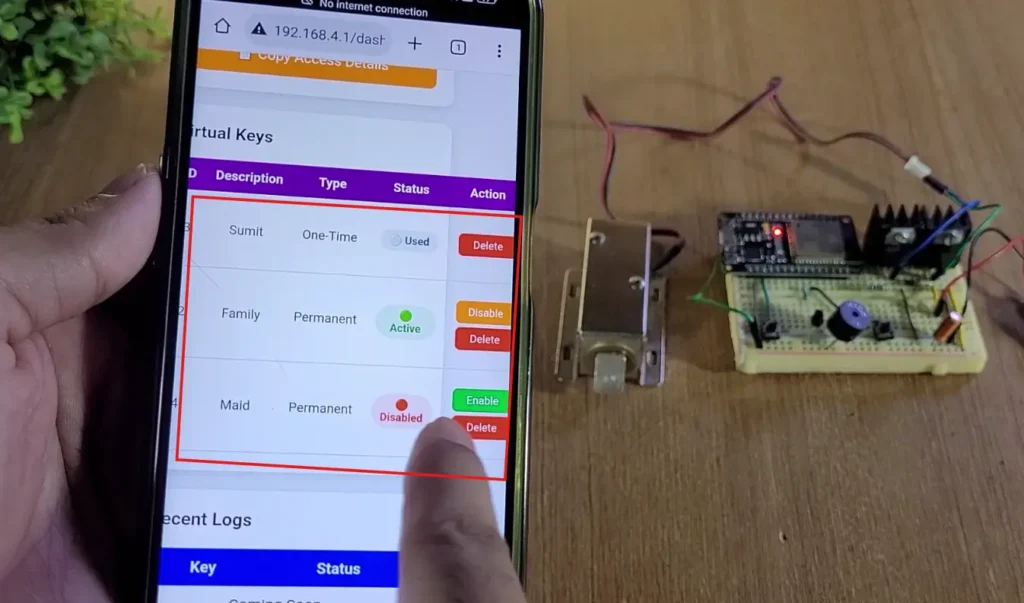
One-Time Keys vs. Permanent Keys
The two virtual key types provide different access behaviours.
| Feature | One-Time Key | Permanent Key |
|---|---|---|
| Intended use | One successful access | Repeated access |
| After successful use | Marked as used | Remains active |
| Can be disabled? | Yes, while eligible | Yes |
| Can be enabled again? | Used keys cannot be reactivated | Disabled keys can be reactivated |
| Can be deleted? | Yes | Yes |
| Best suited for | Short visits and temporary access | Family or regular visitors |
One-time keys are useful when you want to provide temporary access without keeping the same credential active for repeated visits. Permanent keys are more convenient for trusted users who need ongoing access.
What Is the Role of Preferences and LittleFS?
The project uses two local storage mechanisms provided by the ESP32 Arduino environment.
Preferences
Preferences stores small configuration values in non-volatile storage. This allows supported settings to remain available after the ESP32 restarts or loses power.
LittleFS
LittleFS provides a filesystem for storing the project’s local database file. In this project, the key database is stored in a binary file rather than in HTML files.
Keeping storage operations separate from web handling and door-control logic makes the firmware easier to maintain and extend.
Source Code of ESP32 DIY Door Lock project
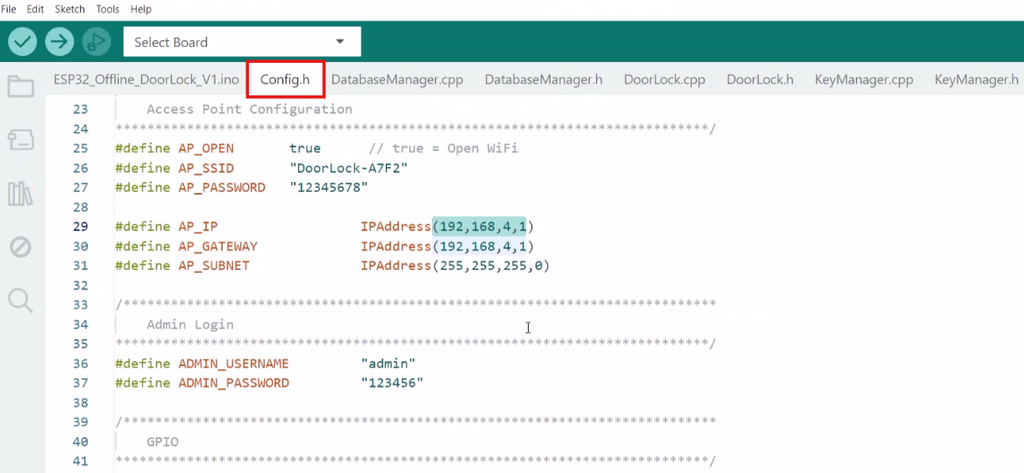
In the config.h you can make the changes according to your requirements. You can refer to tutorial video on the top.
Software Architecture: Modular ESP32 Code
The firmware is divided into separate files so that each module handles a specific responsibility.
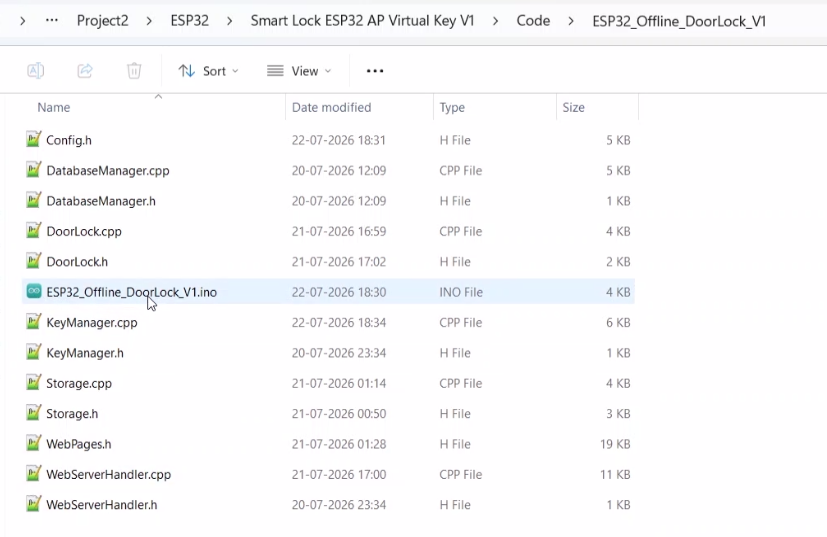
| File or Module | Responsibility |
|---|---|
Config.h | Stores configuration values, GPIO assignments, and default settings |
Storage.h / Storage.cpp | Saves and loads settings and the local key database |
DatabaseManager.h / DatabaseManager.cpp | Manages key records, including adding, searching, updating, and deleting records |
KeyManager.h / KeyManager.cpp | Implements virtual key creation, validation, status changes, and key-use rules |
DoorLock.h / DoorLock.cpp | Controls the lock driver, buzzer, LED, physical buttons, and auto-lock timer |
WebServerHandler.h / WebServerHandler.cpp | Handles web requests, owner authentication, visitor access, and dashboard actions |
WebPages.h | Contains the HTML, CSS, and JavaScript for the login, dashboard, and visitor pages |
ESP32_Offline_DoorLock.ino | Initializes the modules and runs the main firmware loop |
This modular structure helps separate hardware control, persistent storage, access validation, and the web interface. It is also useful when extending the project with new access methods.
Advantages of an Offline Smart Door Lock
No Internet Dependency
The owner and visitor communicate directly with the ESP32 over its local Wi-Fi network. Internet access is not required for the local access workflow.
No Cloud Account or Subscription
The system does not require a cloud service, online database, or paid subscription to perform its core functions.
Smartphone-Based Access
A standard smartphone browser can be used to access the local web interface, so a dedicated mobile application is not necessary.
Customizable Hardware and Software
The ESP32 platform allows you to modify the firmware, replace hardware components, and add new functions according to your requirements.
Educational Value
The project combines embedded programming, web development, local storage, transistor switching, and wireless communication in one practical build.
Limitations and Important Security Considerations
Although this is a useful DIY project, there are some limitations to understand before installing it on a real door.
- Local Wi-Fi range: The visitor must be within the ESP32’s usable wireless range.
- No remote access by default: A visitor outside the local Wi-Fi range cannot unlock the door through the shared link alone.
- Power requirements: The solenoid needs an appropriate external supply and driver circuit.
- Mechanical installation: The physical lock, door alignment, and mounting hardware affect reliability.
- Credential protection: Anyone who obtains a valid access link may be able to attempt access. Share links only with intended visitors.
- Local network security: Use appropriate owner authentication and restrict access to sensitive endpoints.
- Physical security: Someone with physical access to the electronics may be able to tamper with the circuit.
- No guaranteed commercial-grade security: This prototype is intended for learning and experimentation, not as a certified high-security access-control product.
A local Wi-Fi connection does not automatically make a system secure. Before using it to protect valuable property, review the authentication design, token generation, replay protection, request validation, and physical tamper risks.
For a real installation, consider a mechanical emergency release, a safe failure mode, suitable electrical protection, and a professionally designed enclosure. Do not rely on a DIY electronic lock as the only emergency exit mechanism.
Applications of the ESP32 Smart Door Lock
This project can serve as a starting point for several educational and prototype applications.
- DIY home access-control experiments
- Electronics and IoT learning projects
- Workshop or laboratory access prototypes
- Office or studio door-lock demonstrations
- Temporary visitor-access demonstrations
- Embedded web-server tutorials
- Local wireless control projects
- Student engineering projects
- Smart-home automation experiments
For commercial or public installations, additional safety, reliability, and security engineering may be required.
Frequently Asked Questions (FAQ)
Does the ESP32 smart door lock work without the internet?
Yes. The ESP32 operates as a Wi-Fi Access Point, and the smartphone communicates with it over the local wireless network. Internet access is not required for this local workflow.
Do I need to install a mobile app?
No. The dashboard and visitor interface are accessed through a web browser on a compatible smartphone.
Can I share a virtual key through WhatsApp?
Yes. You can share the generated access details or visitor link through WhatsApp or another messaging application. The visitor must still connect to the ESP32 hotspot to access the local page.
What is the difference between one-time and permanent keys?
A one-time key is intended for one successful use and is then marked as used. A permanent key can be used repeatedly until it is disabled or deleted.
Does the project use Firebase?
No. The core version described here uses local ESP32 storage through Preferences and LittleFS rather than Firebase or another cloud database.
Can I add a fingerprint sensor or keypad later?
Yes. The hardware and firmware can be extended to support additional access methods. These additions require suitable wiring, compatible libraries or drivers, and corresponding firmware changes.
Is this project suitable for commercial security installations?
It is primarily an educational prototype. A commercial installation requires a more thorough assessment of authentication, electrical safety, mechanical reliability, emergency access, and tamper resistance.
Conclusion
The ESP32 Smart Door Lock with Virtual Keys is a practical offline DIY project that demonstrates how a low-cost microcontroller can provide local web-based access control. With its own Wi-Fi hotspot, smartphone dashboard, one-time and permanent virtual keys, local storage, manual controls, and automatic relocking, it offers a useful foundation for learning embedded systems and IoT development.
By organizing the firmware into separate modules, the project is easier to understand, maintain, and expand. You can begin with the basic solenoid lock circuit and later explore keypad, fingerprint, RFID, and door-sensor integration.
If you enjoy ESP32, Arduino, IoT, and home automation projects, click here for more practical electronics tutorials.
Build it, experiment with it, and customize it for your next DIY project!