In the Arduino IoT Cloud tutorial, I have explained how to set up FREE Arduino IoT Cloud account to connect ESP8266 or ESP32 and control the appliances with Amazon Alexa and Arduino IoT cloud web dashboard and mobile app.
Related Article:
Arduino IoT Cloud ESP8266 Project
Arduino IoT Cloud ESP32 Project
Table of Contents
Create an account in Arduino IoT Cloud
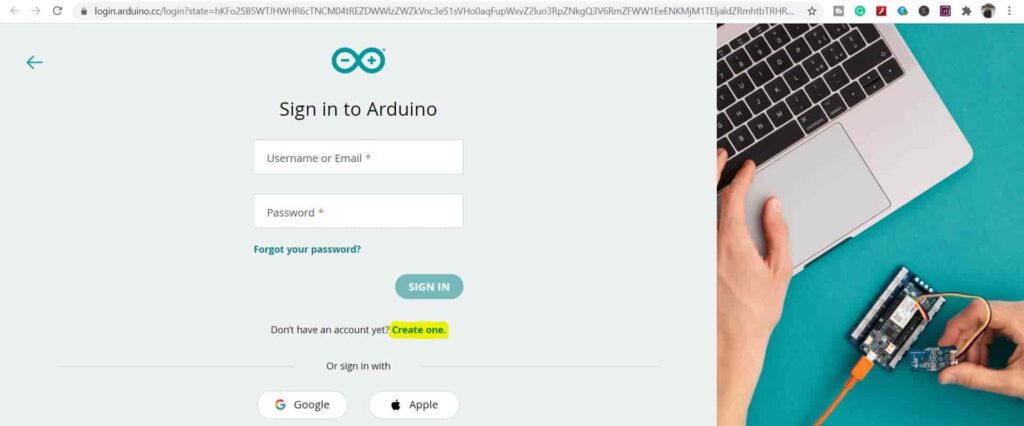
First, you have to create an account in Arduino IoT Cloud. To sign up click on the following link.
https://create.arduino.cc/iot/things
Now click on Create one.

Then enter your birthday and click on NEXT.
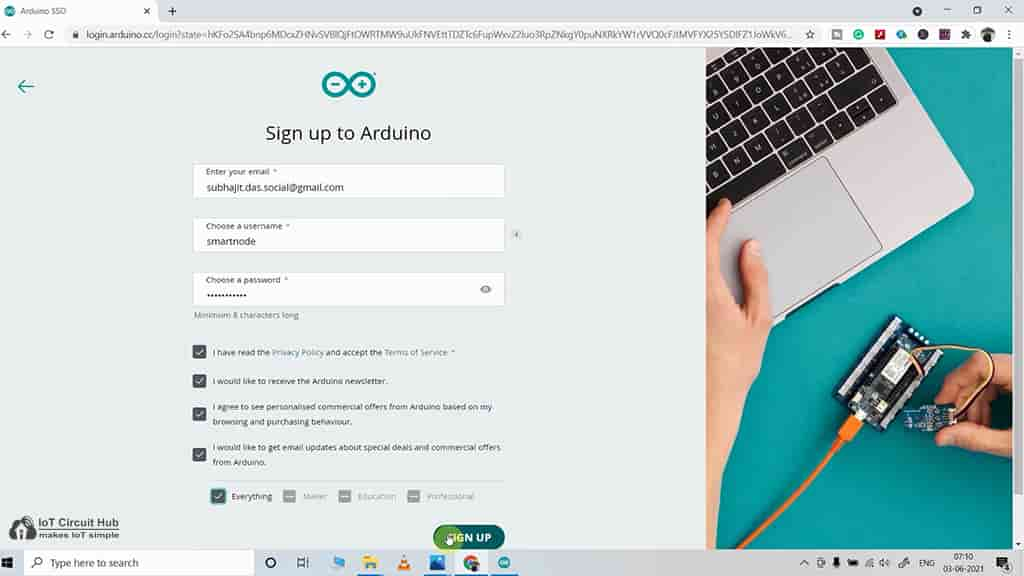
Now, enter the email address, set the username and password for the Arduino IoT cloud. Then accept all the terms and conditions and click on SIGN UP.
Now, you will receive a verification email from Arduino IoT Cloud
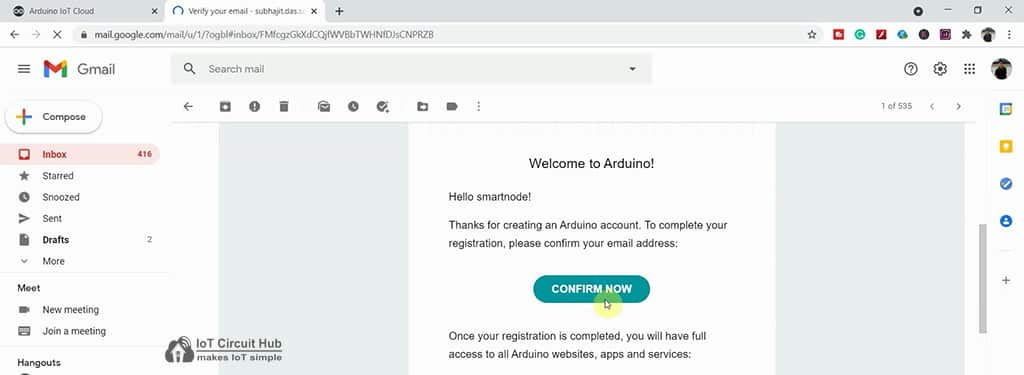
To verify the Arduino IoT cloud account go to your email inbox and open the email received by Arduino IoT Cloud.
Click on CONFIRM NOW to verify the account.
Then go to Arduino IoT cloud account and refresh the screen.
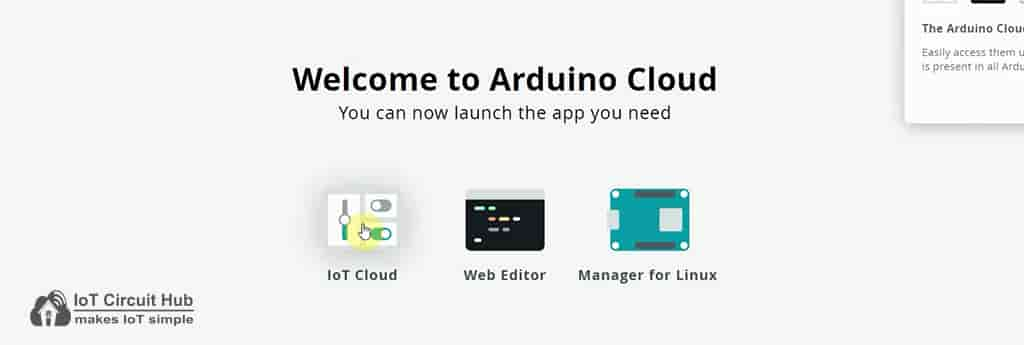
Now, click on IoT Cloud.
Steps to add Device in Arduino IoT Cloud projects
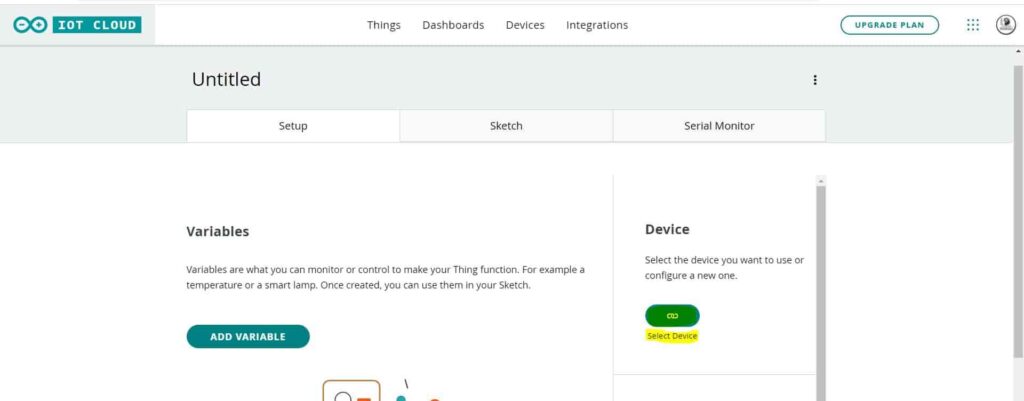
To add Device in Arduino IoT, click on select device. Then select “Set up a 3rd Party Device“.
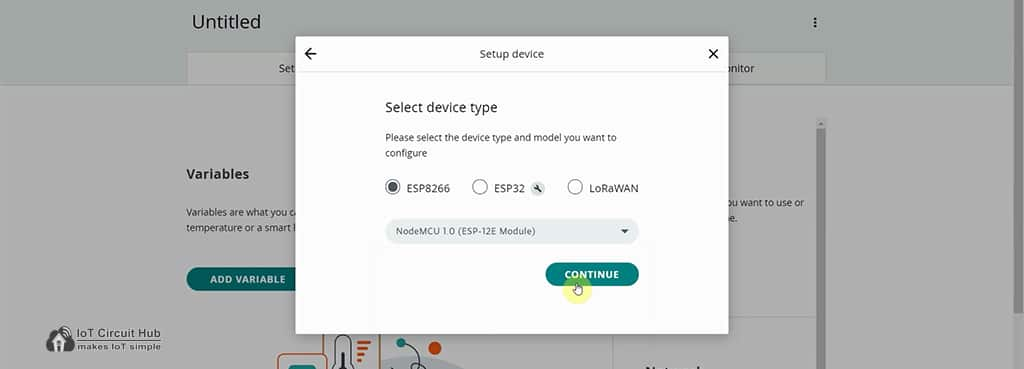
In the Setup Device, select device type as ESP8266 and the model as NodeMCU 1.0.
If you use ESP32 then select device type as ESP32 and related model.
You will get all the Arduino cloud compatible board in the dropdown menu.
After that click on CONTINUE.
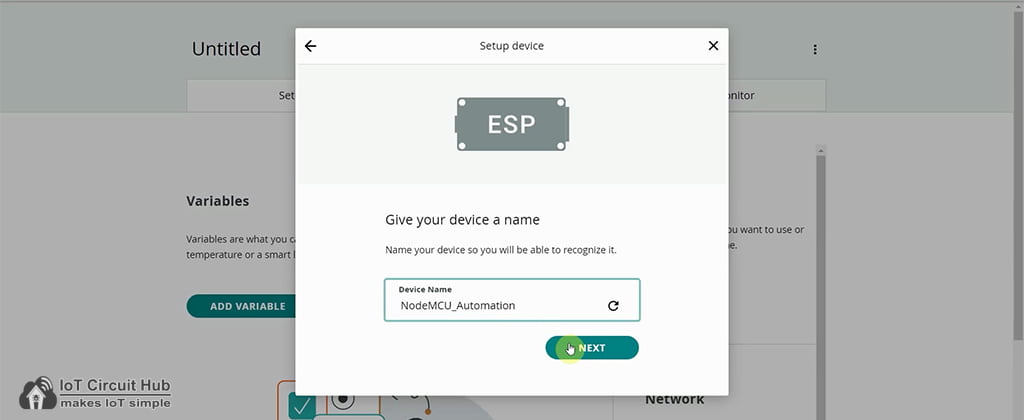
Now, enter a name for the device which you have just created. Then click on NEXT.
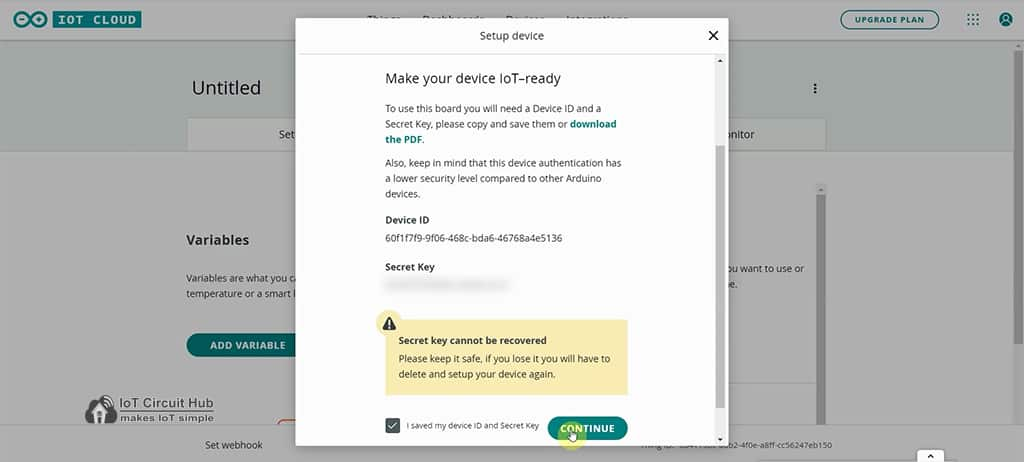
Now, you will get the Device ID and Secret Key for that device. Click on the “download the PDF” to save the details in your local system.
Then click on CONTINUE to add the device.
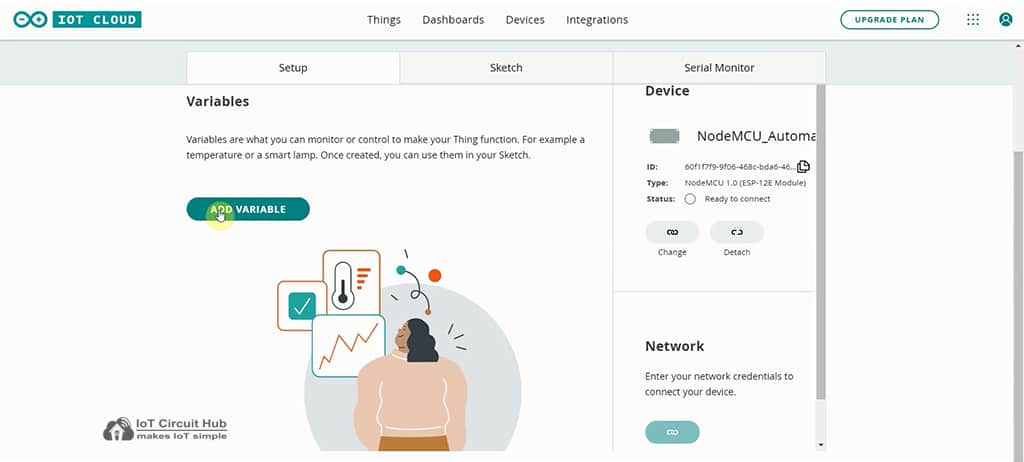
Steps to add Variable in Arduino IoT Cloud projects
to control any relay or to get the data from any sensor, you have to add variables in Arduino Cloud Things.
Here I have added 4 variables to control 4 relays. In FREE plan you can add up to 5 variables.
To add variable click on ADD VARIABLE in the setup tab.
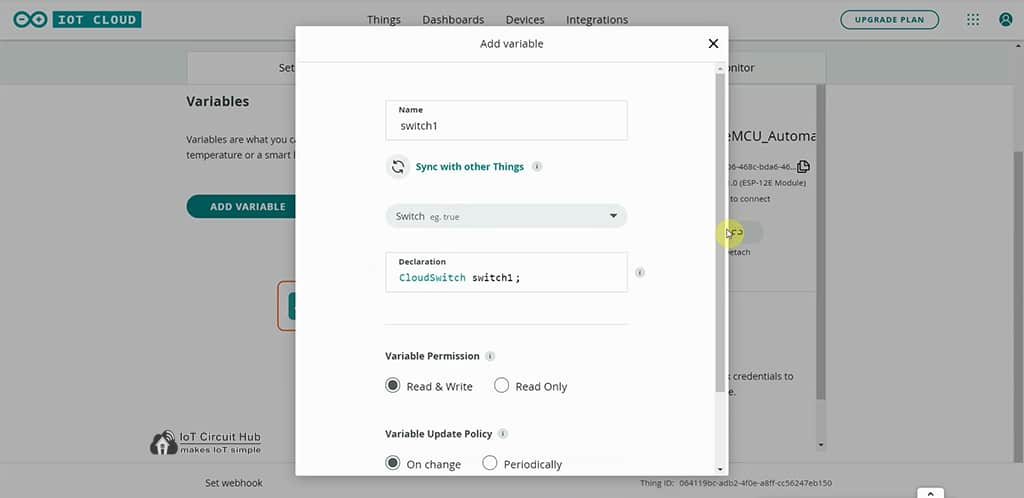
Enter a name of the variable, select the variable type as Alexa compatible Switch.
Select Variable Permission as “Read & Write” and Variable Update Policy as “On Change“.
Then click on “ADD VARIABLE“.
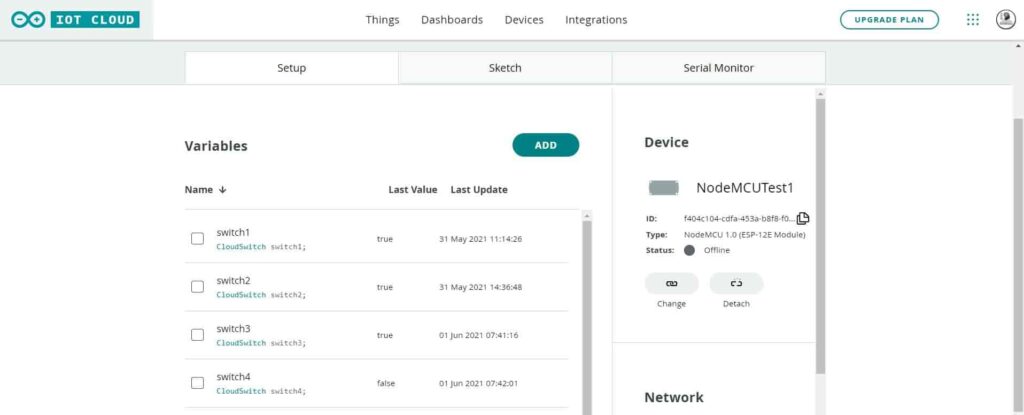
In a similar way, I have added 4 variables to control 4 relays.
Steps for Arduino IoT Cloud Web Dashboard set up
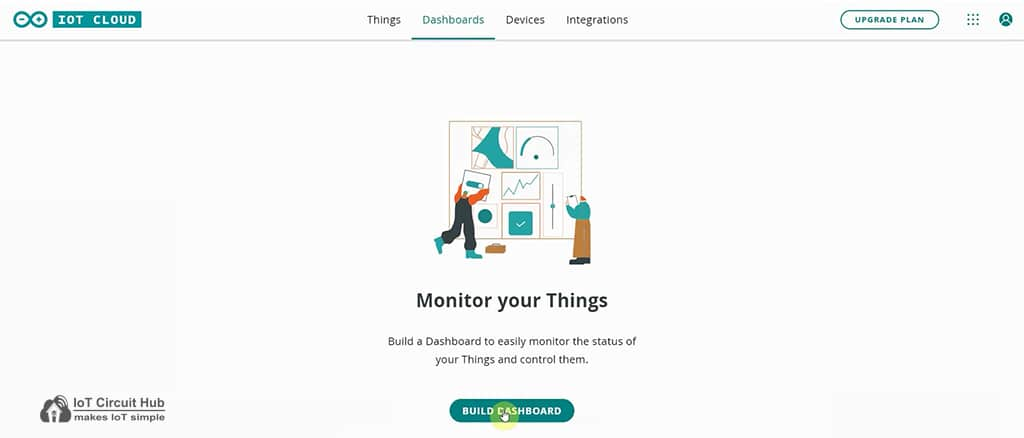
Now, click on the Dashboard on the top. Then click on “BUILD DASHBOARD“
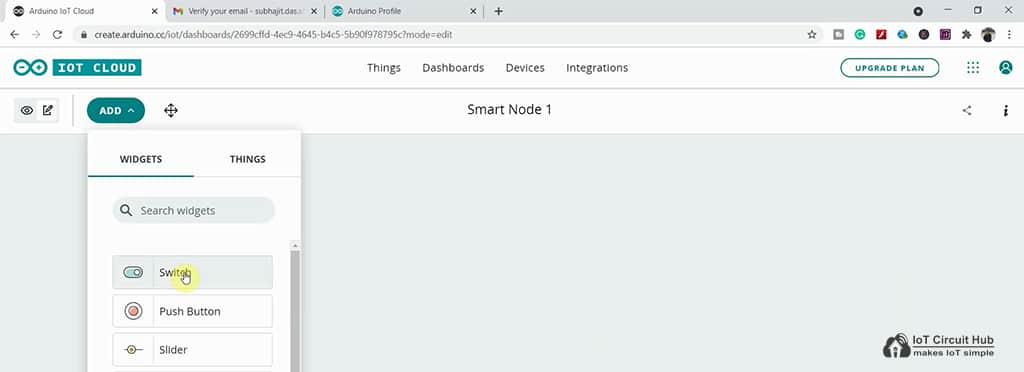
Now click on EDIT icon. Then click on ADD and select Switch widget.
Then enter a name for the Switch widget and click on the Link Variable button on the right.
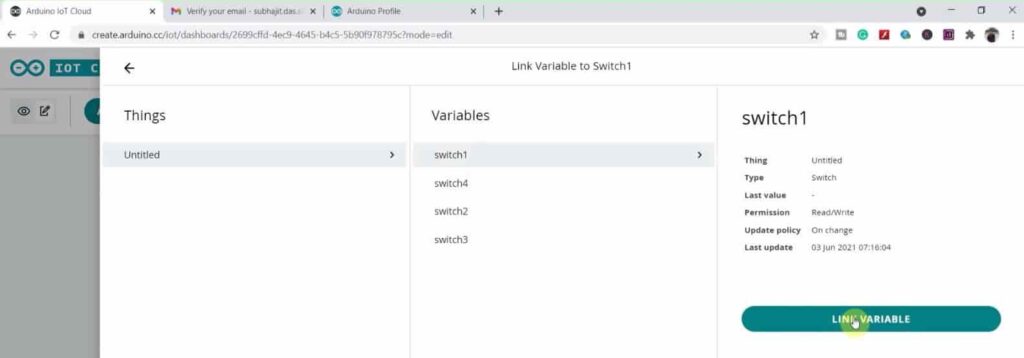
Now, you have link a variable which you have already created, with the Switch widget. After selecting the variable, click on “LINK VARIABLE“.
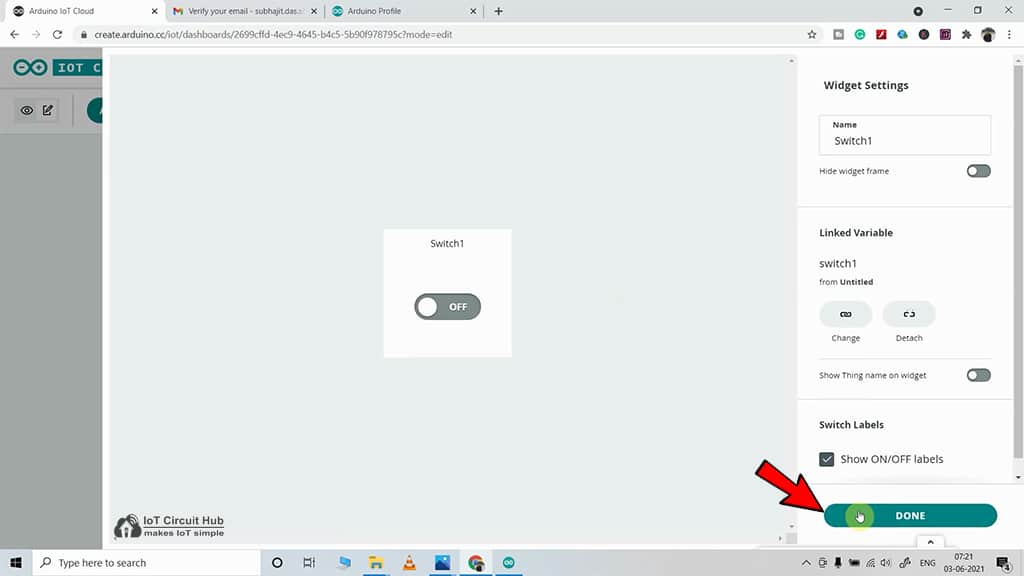
After that click on “DONE“.

In a similar way, you have to add all the required widgets.
Here I have added 4 Switch widgets in the Arduino Cloud dashboard.
Now click on Things on the top to exit the dashboard.
Sketch for Arduino IoT Cloud projects
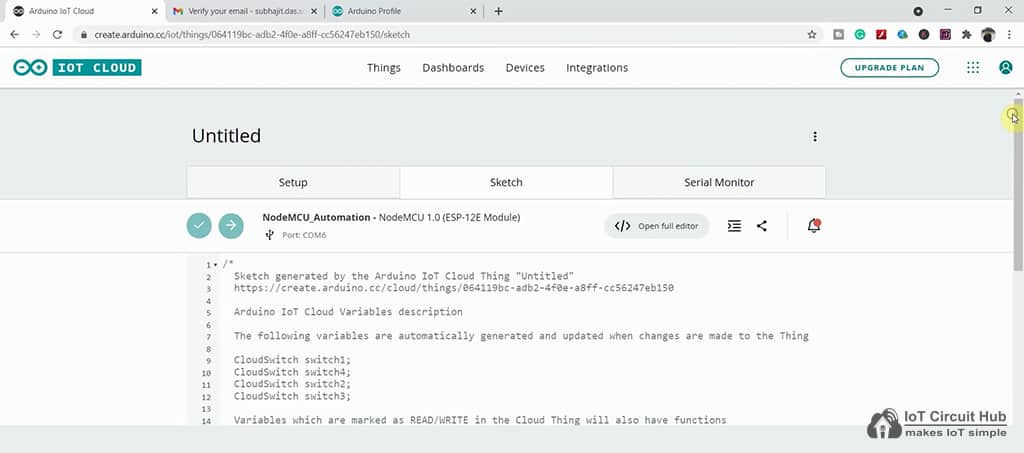
When you add any variable in Things, the Sketch will be automatically updated in the Sketch tab.
You can further update this sketch to add more features as per your requirement. Then click on “Open full editor” to download the sketch in your local system or program the microcontroller from Arduino Web editor.
For my project I have downloaded the sketch, then open it in Arduino IDE to program the microcontroller.

After downloading the sketch, you will get these three files. You have to keep these 3 files in the same folder.
Install Arduino IoT Cloud Library in Arduino IDE
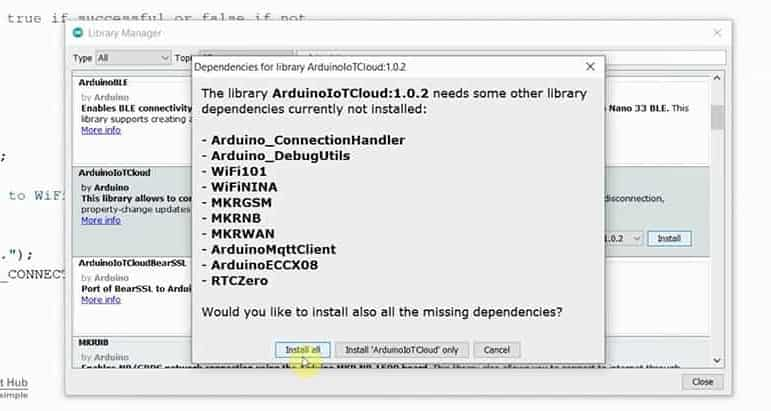
To program the ESP8266 or ESP32, you have to install the ArduinoIoTCloud library and all other dependencies.
Go to Sketch -> Include Libraries -> Manage Libraries in Arduino IDE.
When you try to install the ArduinoIoTCloud library, it will ask you to install all the dependencies. Then click on Install All.
Update the Arduino IoT project Sketch
Now open the .ino file in Arduino IDE. You have to enter the THING ID, DEVICE ID, Wi-Fi credentials, and SECRET KEY.
You will get the Device ID and Secret Key from the PDF which you have downloaded. And to get the THING ID please refer to the following picture.
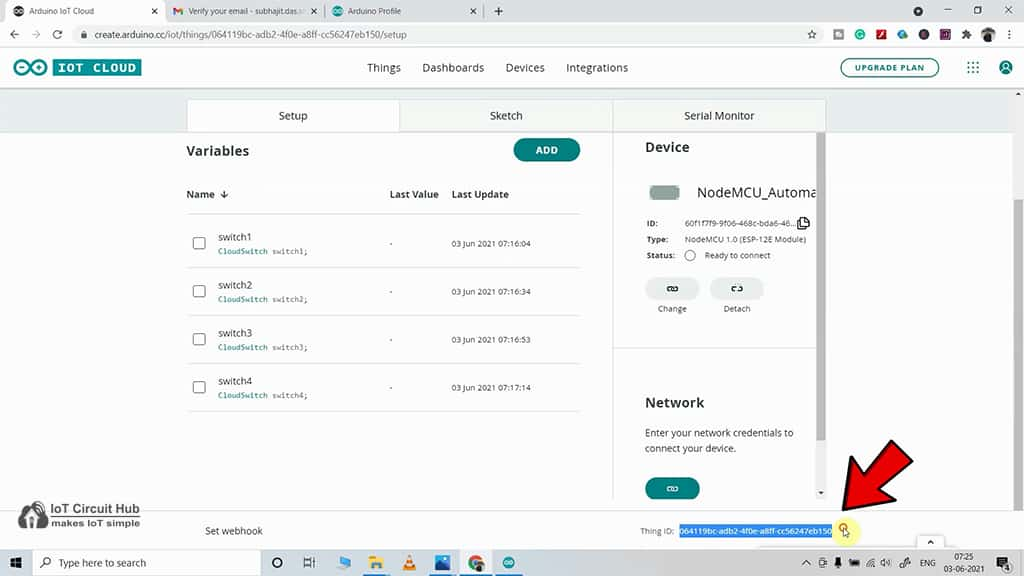
Now copy the THING ID and DEVICE ID and paste them in the thingProperties.h file in Arduino IDE. (refer to the following picture)

Then update the Wi-Fi credentials and Secret Key in the arduino_secrets.h file in Arduino IDE. (refer to the following picture)

Now you can upload the code to ESP8266 or ESP32 as per the device you have selected in Arduino Cloud.
How to use Arduino IoT Cloud Remote App
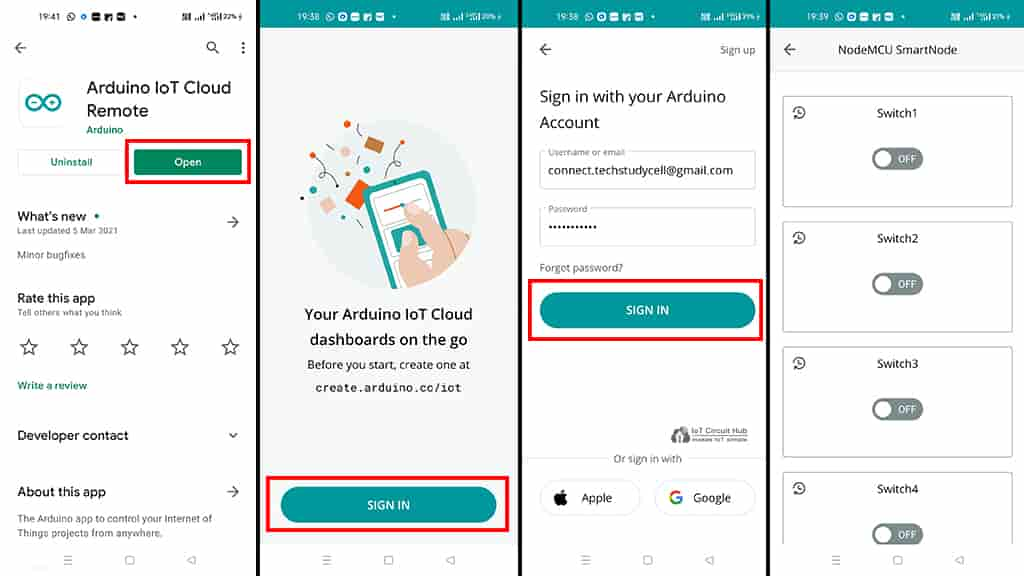
1. Download and install the Arduino IoT Cloud Remote App from Google Play Store & App Store.
2. Tap on SIGN IN.
3. Enter the Email ID and Password of the Arduino IoT Cloud account, then tap on SIGN IN.
4. Tap on the Thing name (which you have created) to open the dashboard.
You can also connect Arduino IoT Cloud with Amazon Alexa to control the appliances with voice commands. Click on the following link for more details.
Connect Arduino IoT Cloud with Amazon Alexa
If you face any issues you can always let us know and please share your feedbacks with us.
Thank you for your time.

